Yeah… so, I don’t know
Some would say this was to be expected, and I kind of did expect it. Which is why I was hesitant to pull this SR apart and dig into it, but I did. And the findings were… less than ideal.
Okay let’s get back to the start of this mess, so the KA blew a headgasket, I took it out, stripped the bay, and then? I took a nice summer break away from everything. Not sure if it was the best idea now that all this has unfolded but, you live and you learn.
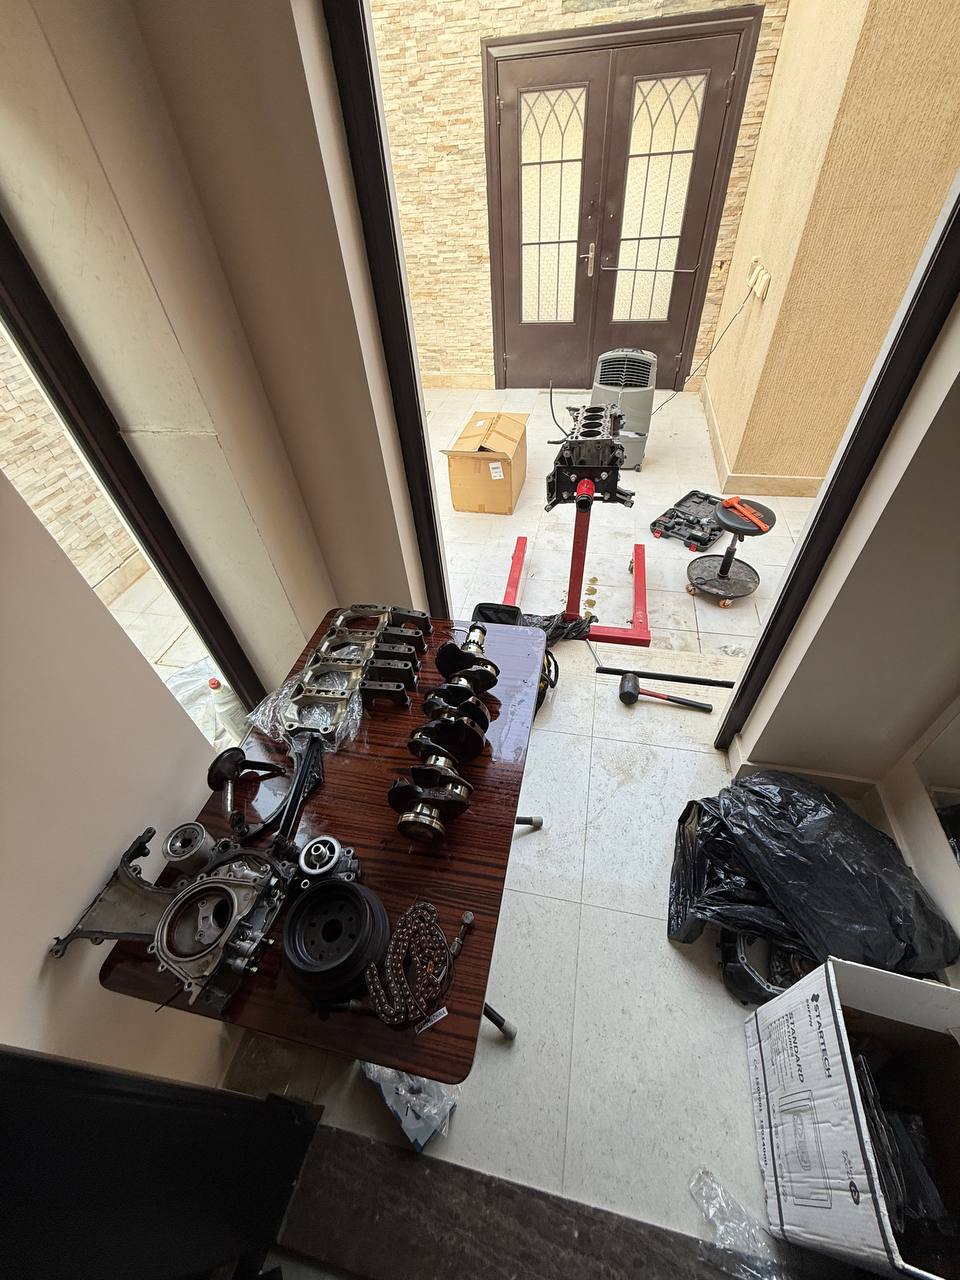
When I got back, I hit the ground running and wanted to send the car off to get the bay prepped and painted right away, but some complications came up and the shop could not accommodate me into their schedule. I guess summer is here and that’s when all the car building happens as no one is driving in 40C°+ weather. So I instead diverted my attention to the new heart of my beloved 240, the SR20 I had bought earlier this year. I stripped it down to a long block and then tucked it away at the back of the house, only looking into what’s under the valve cover and leaving everything else to be a mystery.
I was dreading this part a lot, I kept thinking that if I ignored it, it might just be okay, Ignorance is bliss type thing? The original plan initially was to run an unopened, stock, simple SR. It’s part of the reason I got a DET instead of a DE and building it. But with all the red flags I’d come across already. I already knew the cams were in bad shape, and that isn’t a good sign obviously, lots of excess RTV clued me that the head was definitely pulled before, so this left the question of what kind of headgasket was in there? Was it new or did they reuse the old one? I felt like like I needed answers.
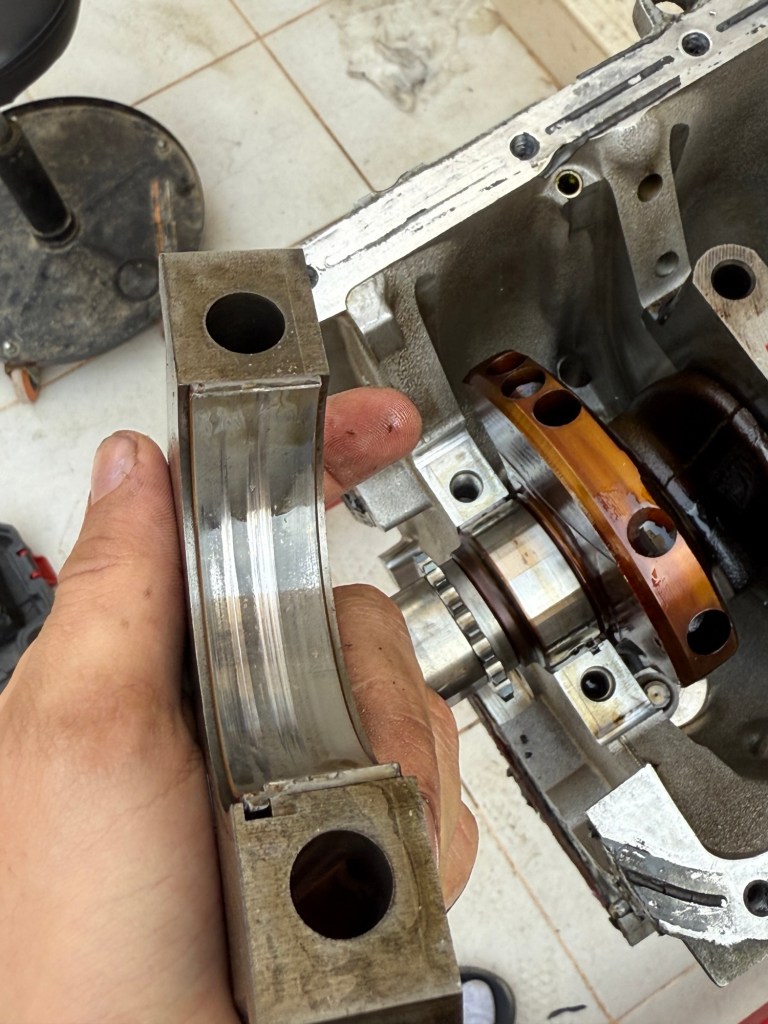
So the day came and piece by piece we (me and a good friend I’m very grateful for) took the head off. cam caps, cams, rockers all came out. We were in the the moment and weren’t inspecting the parts too well as we disassembled. The rockers came off one by one very carefully, each in it’s own bag with it’s respective shim/guide. Off came the head soon after, a very nerve racking experience for rookies like us, but we got it done.
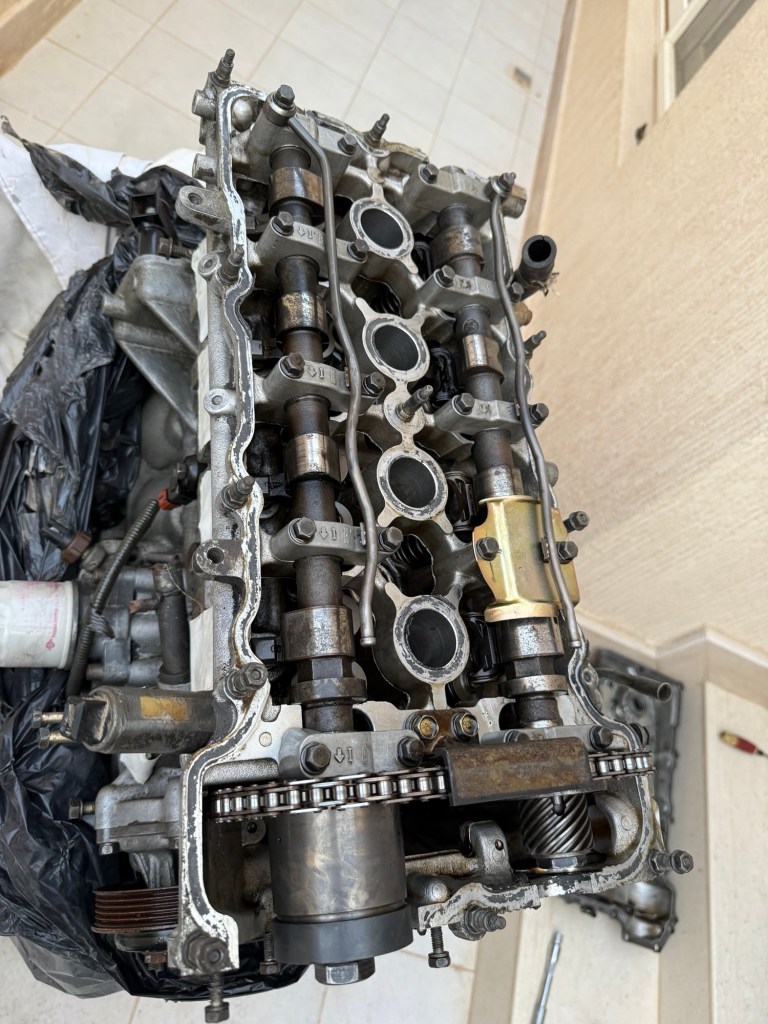
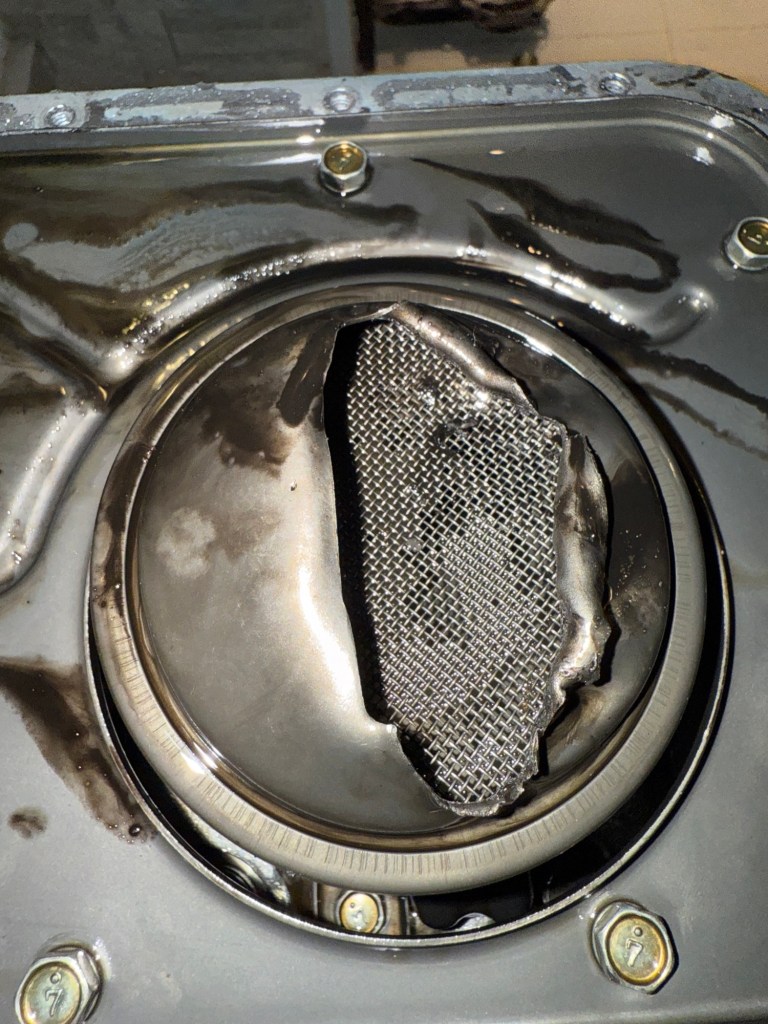
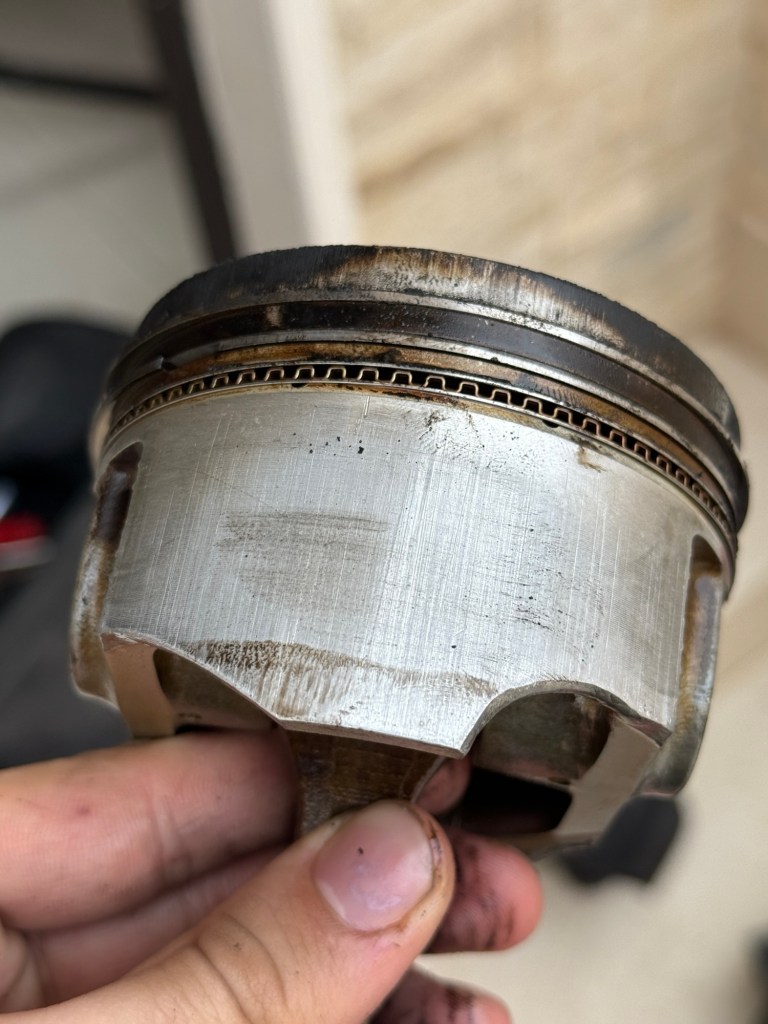
As the light shined onto the pistons for the first time in ages, they did not look too happy. Black and full of burnt up excess fuel and carbon. This thing ran RICH. Not exactly what I was hoping for but wasn’t a total bummer, we called it a night there and put everything into storage.

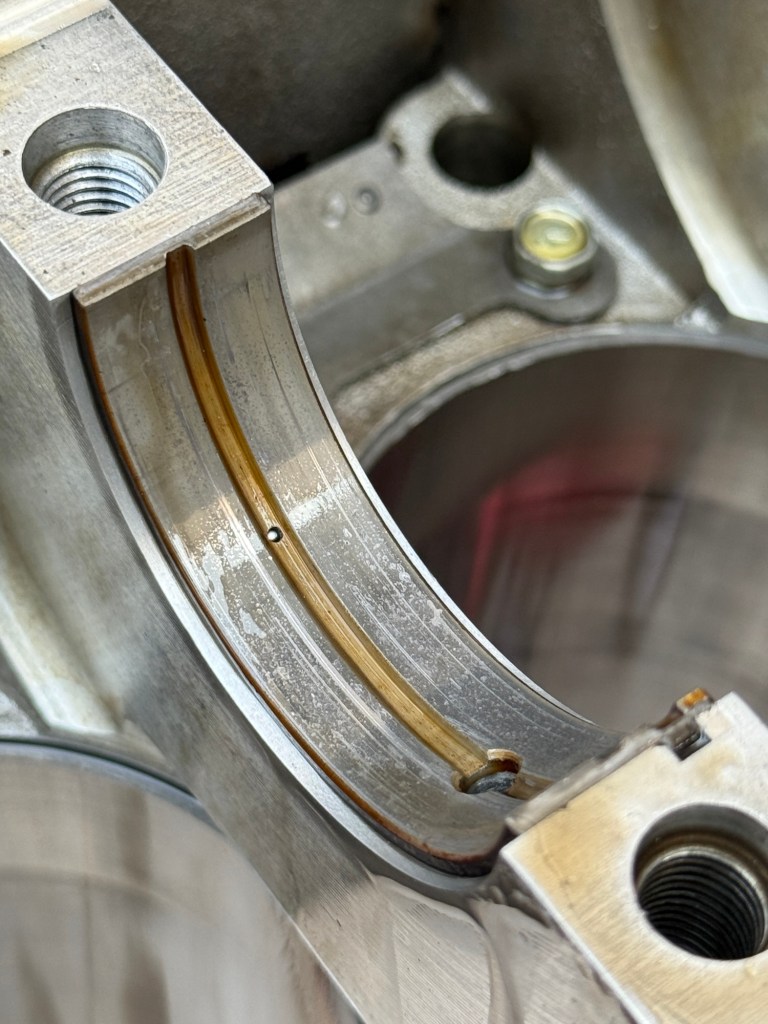
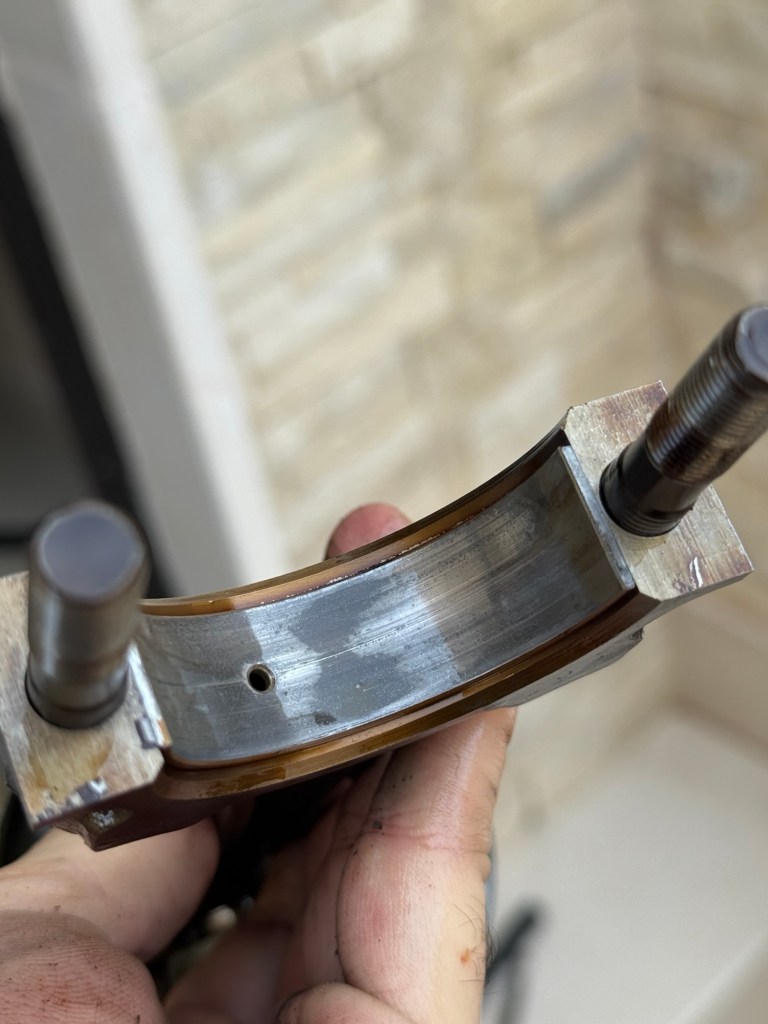
I went over the parts one by one and assessed the damage. Cams: unusable, which isn’t a good sign but it happens, after taking a look at the oil squirters some of the holes seem to have been rusted shut. which meant a few of the cam journals did not get the necessary oil lubrication. Low lubrication to the cams meant that the cam caps and journals won’t be better shape. Out of the 10 cam journals 4 were pretty scorn up. Could easily feel them with my finger nails. Which is not good. I asked a few friends for their opinions, and got lots of different answers but the consensuses was to get it checked by a professional to see how out of spec (if at all) it was. So I did just that, went to a local, pretty shabby looking machine shop, they said they might be able to polish them just good enough for it to not be a concern, and that they’ll call me in a few days, those days pass by and I got nothing, so I dropped by to check out the progress… there was none.

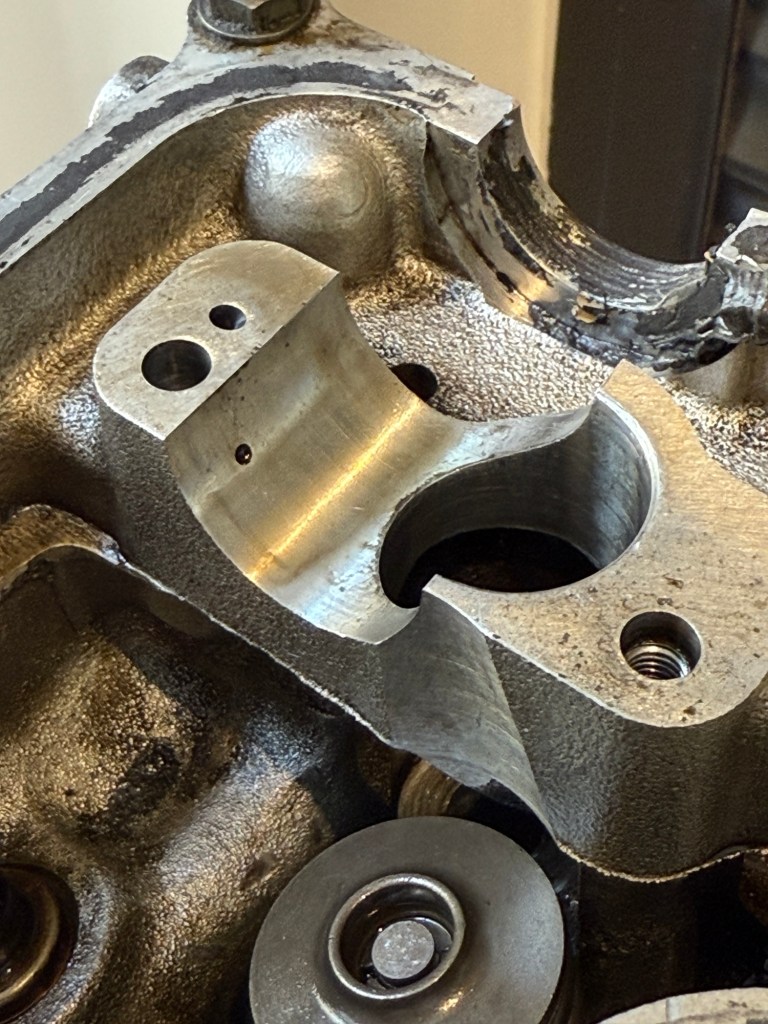

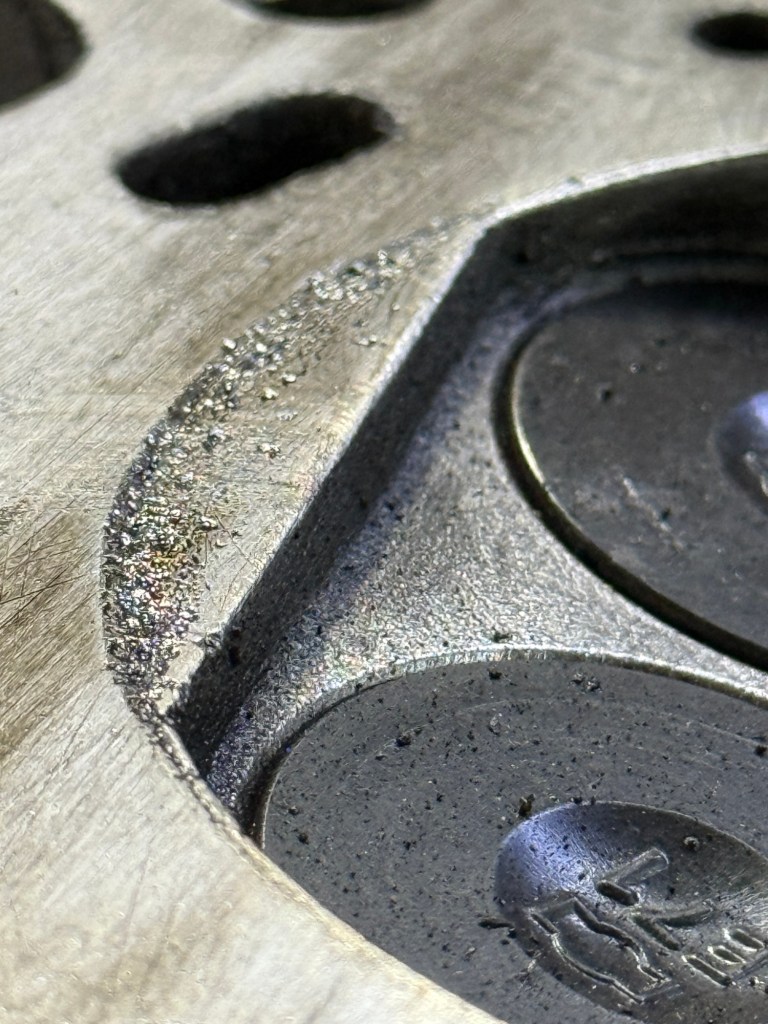
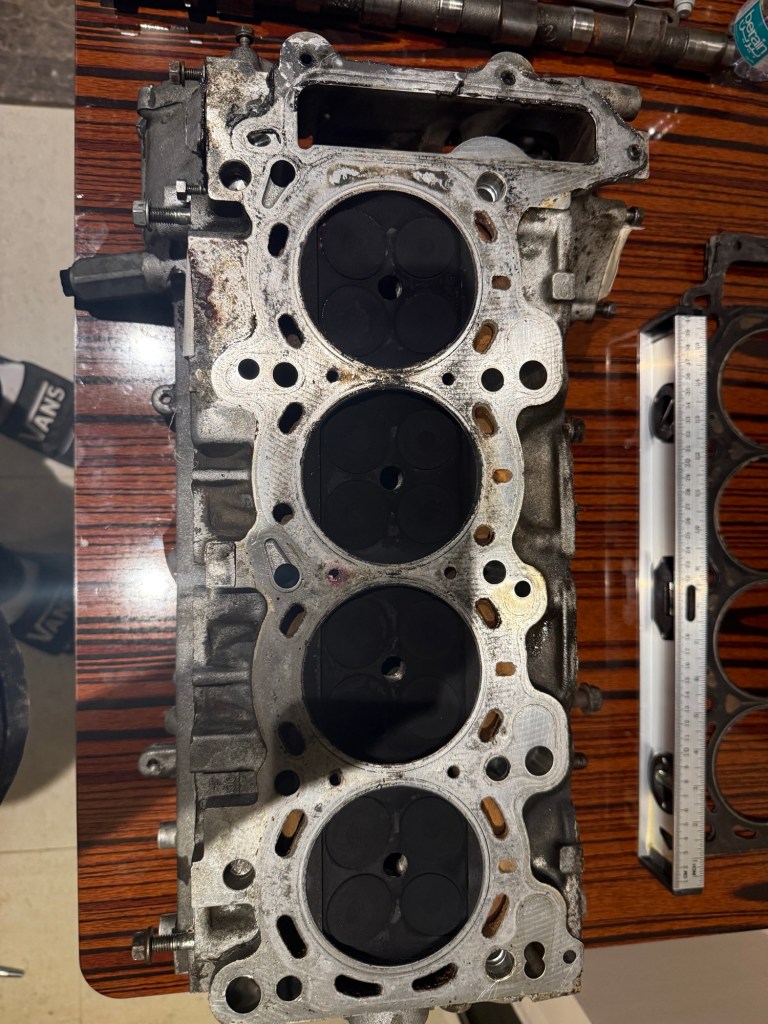
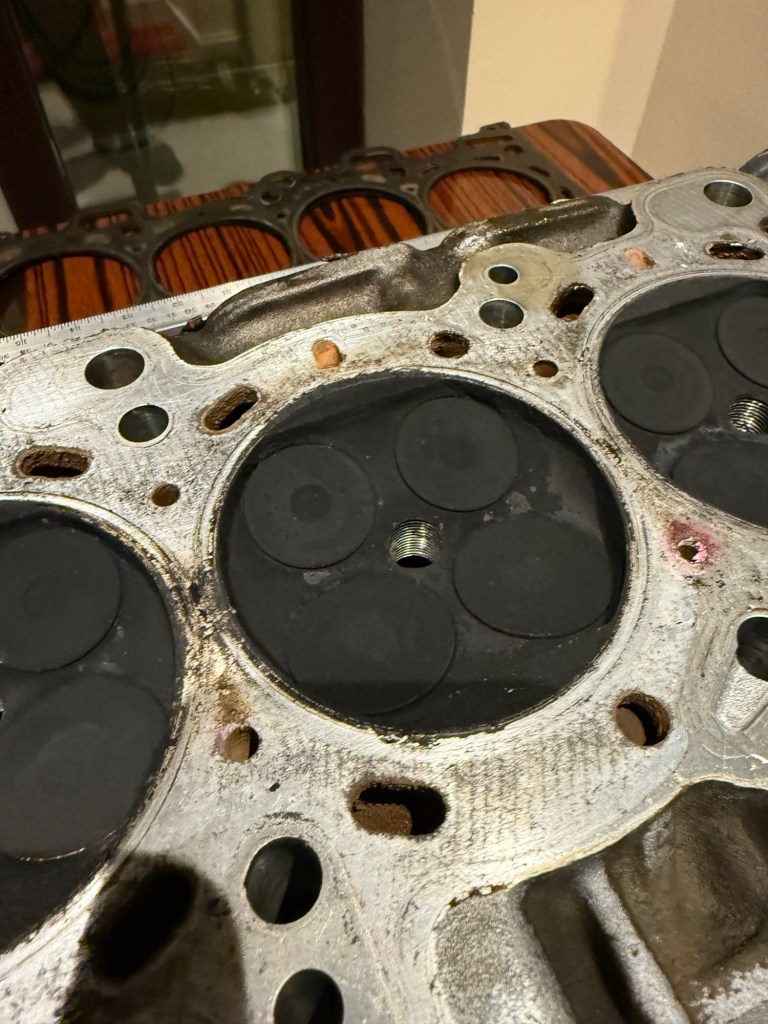
The head was beat, the under side had way too much pitting, was in bad shape, definitely overheated a few times, and oh, a bent valve!
Head was pretty much unusable.
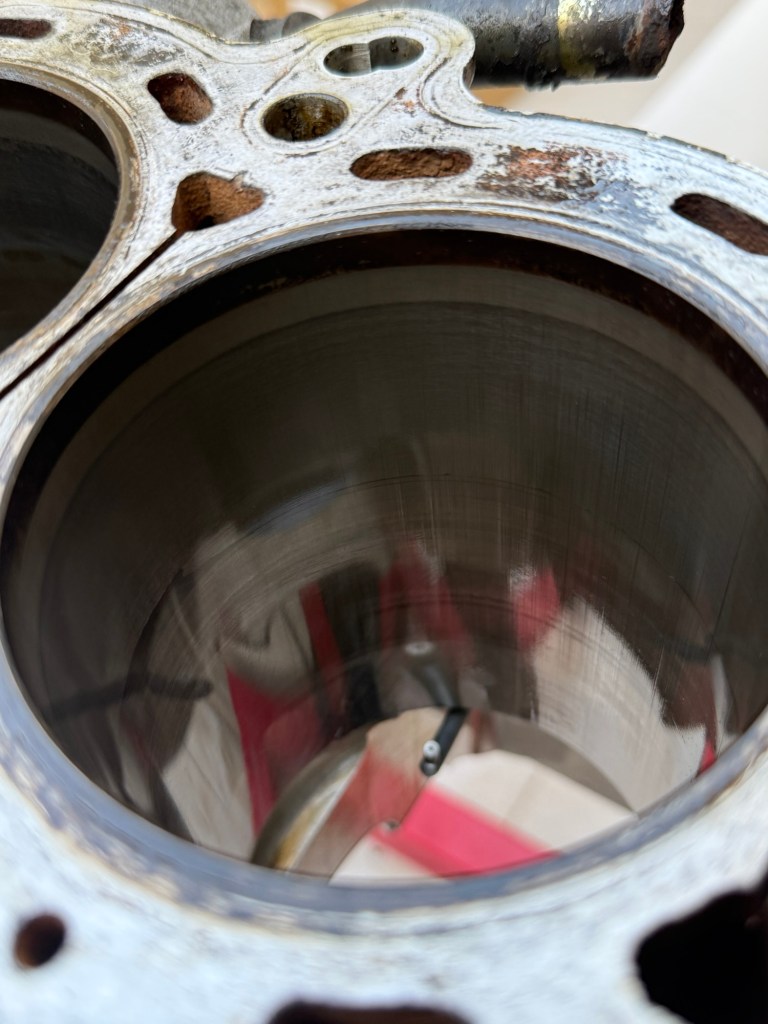
By that day I had already dug in to the block which I was just as hesitant to do, but at this point might as well, with the head’s condition I wanted any surprises to make them selves known early on so I know what I’m getting my self into. The piston skirts didn’t look too hot, bearings looked worn, and cylinder walls… not the best. So I took the block to a different machine shop, one that seemed a bit more professional and experienced. They gave me the same opinion on the head, as for the block, condition as expected, resurfacing/decking was a must and oversized pistons recommended. The crank I could get away with a polish on which I’m glad is the case, not much I can be happy about so I’ll take it.
With all that laid out and the engine completely disassembled, I needed a new plan. I was pretty depressed to be honest, this was not part of my original one, definitely felt some regret not taking better precautions when buying this engine. But gambling on another unknown history engine was 100% out of the question, as finding an SR, let alone an s14/15 one is hard enough already out here, and a clean one would mean paying over $4k, for that much I could just build up mine from the ground up and have a verified, fresh, to my own specification engine. Which was the obvious choice.
I’ll go over the parts list in this post, and hopefully by the next one one, the engine will be put together, I plan on doing as much of the work myself so I’ll document that as I go. So, new engine specs+why I decided to go with the parts I did:
Starting off with internals, my stock pistons are unusable since I need to go a size up and overbore the cylinders, initially I wanted to keep costs low and go with oem z32 pistons, those are relatively cheep and available new. they are 87mm compered to the stock 86mm SR20 ones. and 87mm is pretty much the maximum overbore that can be done on a sleeveless SR. So doing z32 pistons would leave me with no room for future problems, plus you always try to keep the cylinder walls as thick as possible. the other option which is what I landed on. Is doing aftermarket 86.5mm pistons. these would come with a few benefits, they’ll require less boring to fit, which means thicker walls, stronger block, and more room in case things ever go south in the future before needing to put in serious work to save the block. They’ll also be forged, meaning they’ll be lighter, handle more power, and higher RPMs with less issues.
It seemed obvious to me that the latter was the better choice, so that’s one part done, now that I knew what size piston I wanted, I had to choose a brand and model. With way too many choices out on the market, especially from American brands that got all kinds of different variations. CP, Wiseco, JE, Manley and lots of others all with many different compression choices I don’t know anything about. They all had one thing in common though. Expensive and overbuilt for what I want. Most of the pistons available from US brands are closer to racing pistons than a slight upgrade over stock.
From my (very simple) understanding, race pistons require larger tolerances, which means they handle more power but also wear out the walls quicker and are less street friendly. That is not my goal, I’d rather a 300hp engine that lasts me 10 years, than a 500-600 one that lasts 5 at most, or 2-3 at minimum. With that in mind I turned to the Japanese tuning brands. Japanese brands are usually known to walk the line between improving on the oem stuff while staying balanced in terms of reliability and price. The two main Japanese brands known for their engine internals are HKS and Tomei. Both have been in the tuning field for over 30 years, with proved racing teams and a lot of victories backing them. HKS was my first choice but they unfortunately only offer pistons in 86mm & 87mm. no 86.5mm (except if you get the 2.2L stoker kit) Tomei on the other hand does offer 86.5mm pistons for the stock crank.
From my research, Tomei pistons are stock compression and are made out of 4032 aluminum unlike most forged pistons, which means although they don’t handle as much power, they require less clearance and expend less with heat meaning they act closer to an oem piston than the typical forged one. That seemed to align with I wanted better. And Tomei seems to recommend them up to 400hp which is more than I ever plan on reaching.
so with the pistons decided on, I was torn between reusing my stock connecting rods, getting new oem ones, or just upgrading to forged ones as well. This decision was harder than the pistons to be honest. Reusing my old ones sounded really nice in terms of budgeting, I was already way over what I initially intended to spend, but with everything being replaced with new stuff. It would really suck to have the one thing I don’t replace fail on me. Looking into new oem ones, the cost wasn’t bad, but it also wasn’t far off getting the Tomei H beam forged ones…
So in typical car guy fashion, I said to myself “fuck it!” like we all do at some point, and placed myslef a nice expensive order through Jesse Streeter, the the part exporting legend. He got me a great deal on the Tomei parts. and also a few other things.
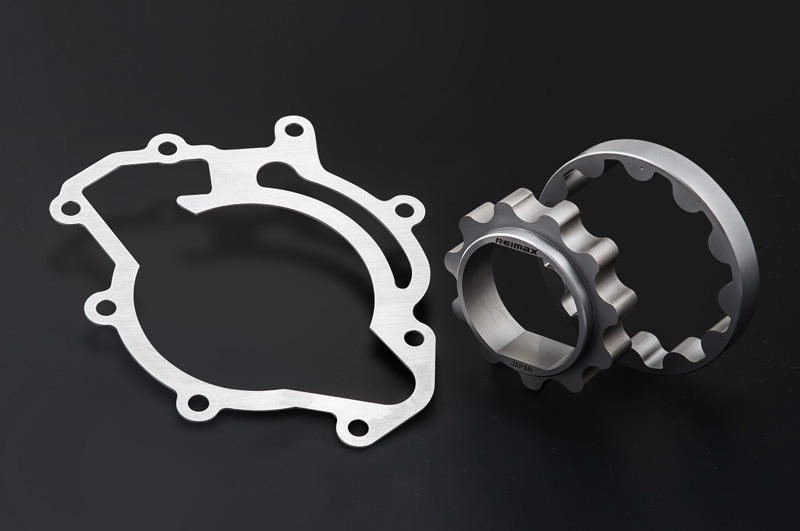
With the internals decided on, everything else followed suit, at this point I knew I’m too far in to not do this engine justice, anything I was planning on reusing to save costs I decided to replace with an improved or new oem replacement. two parts I decided to improve on are the water and oil pump. Although I had already bought a new oem water pump, and new oem oil pump gears to replace the old ones. I came across a brand called Reimax, also more commonly known as Reinik, which is a well known GTR tuning shop, building high performance RB26s since the 90s. they recently began expanding their selection of engine parts to include stuff for the SR20. They developed a set of oil pump gears that are thicker and made of a stronger material, the kit comes with a spacer like gasket for the inner oil pimp cover to accommodate for the thicker gears, this kit allows your pump to have higher oil pressure and keep the engine happy with the addition of an oil cooler, making the oiling system much more bullet proof.
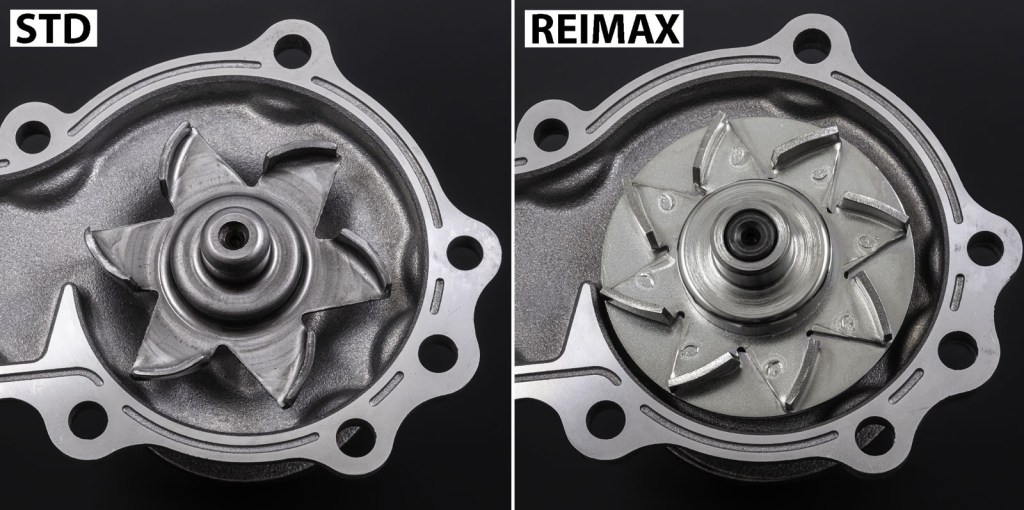
They also just this month came out with their improved water pump, which has more fins and a claimed “theoretical discharge volume that is approximately 30% higher than the standard product.” which sounded very intriguing to me. Cooling is #1 way to keep your engine happy, especially out here when it’s over 25 C° most of the season.
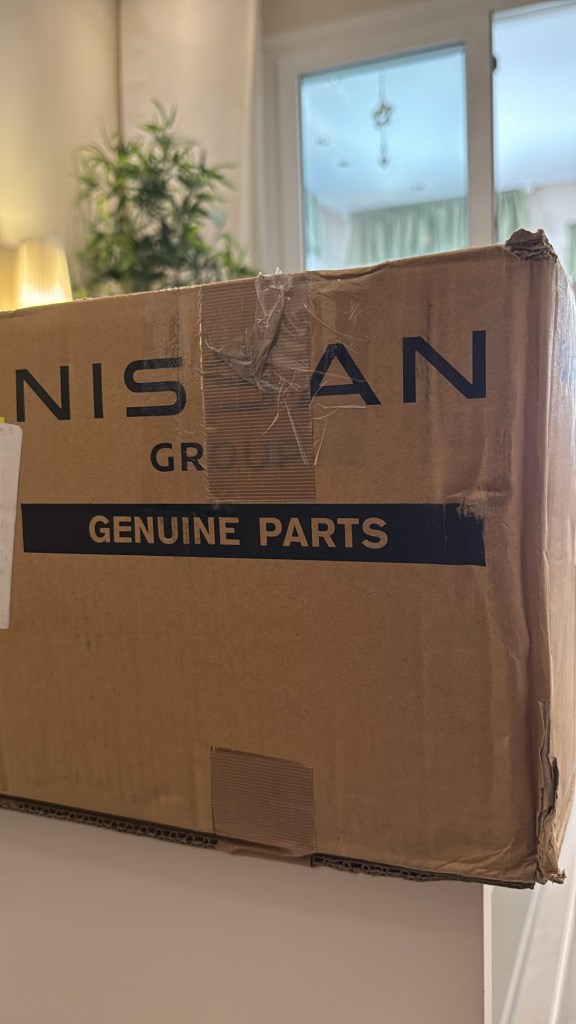
Another major part is the head, my original one was toast, and trying to source a used replacement in good condition proved to be a difficult task, I bit the bullet on this part, luckily it seems that Nissan either brought SRs back into production or the heads at least were available for a while. As I was able to order a BRAND NEW HEAD from Z1 in the USA, not only that but for a 40% discount which is crazy, the head did cost a decent amount to ship but I feel it was well worth it!


Now comes some of the smaller parts, Mazworz ARP head studs are a must, OEM head bolts are strong but I am not a fan of the Alan key style bolts as they feel very prone to rounding out, which is something I’d definitely like to avoid. APEXi 1.1 88mm headgasket, this seems to be the 1# recommendation for SR headgaskets, I went with a 88mm one instead of 87mm, as most recommended to have at least 1mm difference between the pistons and head gasket. I also managed to source a used BNR32 ARC intercooler, a bit dirty but should work great!

King main bearings and ACL rod bearings, nothing out of the usual. All new timing components, I also got a Mazworx Chain tensioner from a friend, will see weather I’ll use it or not as I also got a new chain and some say to run it at first with the hydraulic tensioner to let it stretch. The valve train I plan on keeping mostly stock at first, I got used stock cams that are pretty clean and were super cheep, won them at auction for $3 before shipping and fees! I will stick with my stock springs and retainers, and replace some of the valves with new oem ones. I’m not sure if stock cams will stay for long or if I’ll swap out for something bigger, I did however order plenty of rocker guides as I plan on doing the dual guide mod for the rocker arms. To prevent any rocker flying issues that might occur. My rockers were in okay condition, a few seemed a bit more worn out than I was comfortable with to reuse. New oem ones are insanely expensive so I got a set of clean used ones, so will probably use a mix of both sets.
Depending on when the engine gets put together, at the time I write this Kelford is developing new SR20 rocker arms that seem promising. If that becomes available before I get the engine put together I’d definitely like to try them out. Same thing with the lifters, a new style with clips became available which I’m interested in. When paired with the dual guides your rockers will become held down at all 3 corners which sounds like the proper way to do it. I do however have new stock ones so I’ll leave that to budget constraints when the time comes.
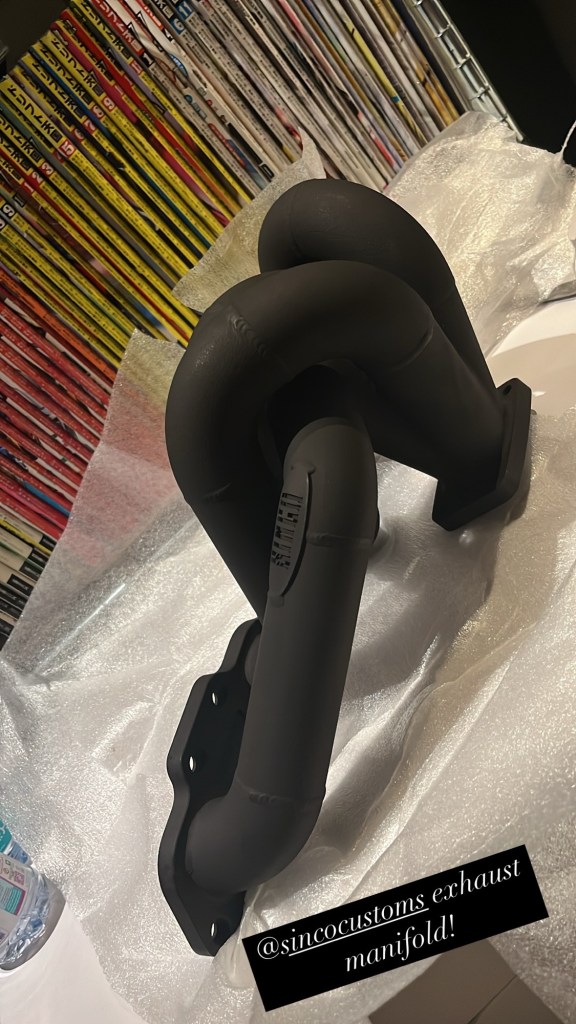
For the turbo and exhaust side of things, the same friend of mine that hooked me up with a few parts, hooked me up with a GTI-R T28 journal bearing turbo, these although are less responsive because of the journal bearings and bigger AR, they have a higher mid range and make slightly more power, I originally wanted a T28 off an S15, but this is almost as good and more importantly, a great deal (thank you Omar!) it will be a great turbo to start off with and then see what I like and don’t like about it. I can move to a more responsive but less peaky S15 T28, or if I want a bit more power, can move to an aftermarket HKS, APEXi, or Tomei bolt on turbo. For the manifold I decided to treat myself, stock is good enough for most setups around 300hp, but let’s be honest they don’t sound the best, so, I went and got one of the best sounding SR manifolds all the way from New Zealand, a Sinco!
They sound great, look great, and are strong as hell, they come with a 5 year warranty against cracks which is a huge plus. Paired with a manifold to block brace it should handle lots of abuse!
For the downpipe and exhaust, a Moon face oval downpipe will both give the car a distinct sound and provide ample ground clearance as that’s one of the lowest spots in the car when moving to a big exhaust system, it’ll then connect to a single exit Kakimoto N1 catback, with a single middle muffler. It’s said that this catback is more on the quieter side, so if it’s not load enough I might ditch the middle muffler, but will play it safe for now and see how it sounds with it.

There are still some parts I’m yet to order, but most of the major components for the engine are here/on the way.
While I was bored this past week I got started on a few small projects, small stuff that weren’t hard but I was dreading because it involves cutting and being accurate or just a bit time consuming.
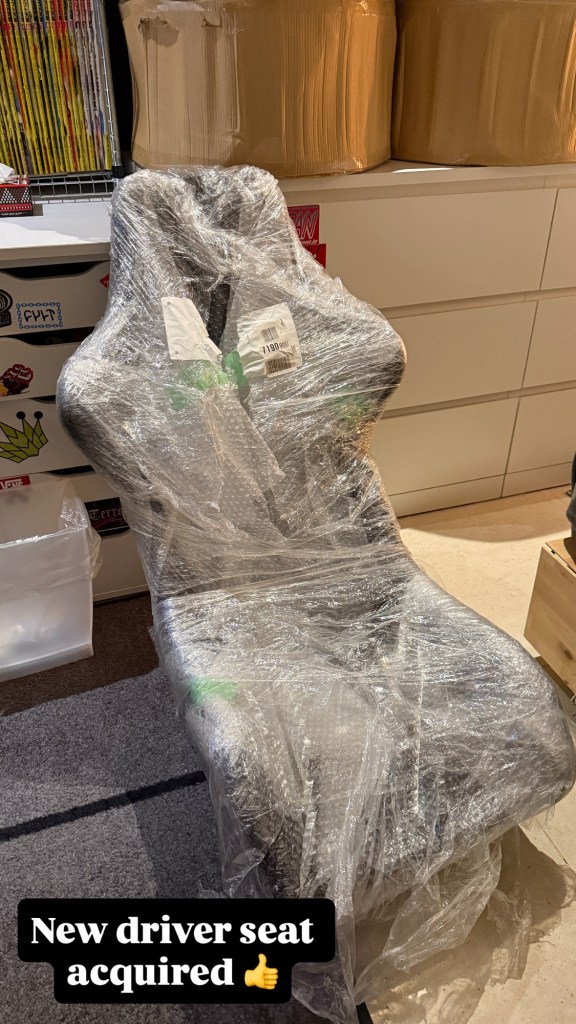
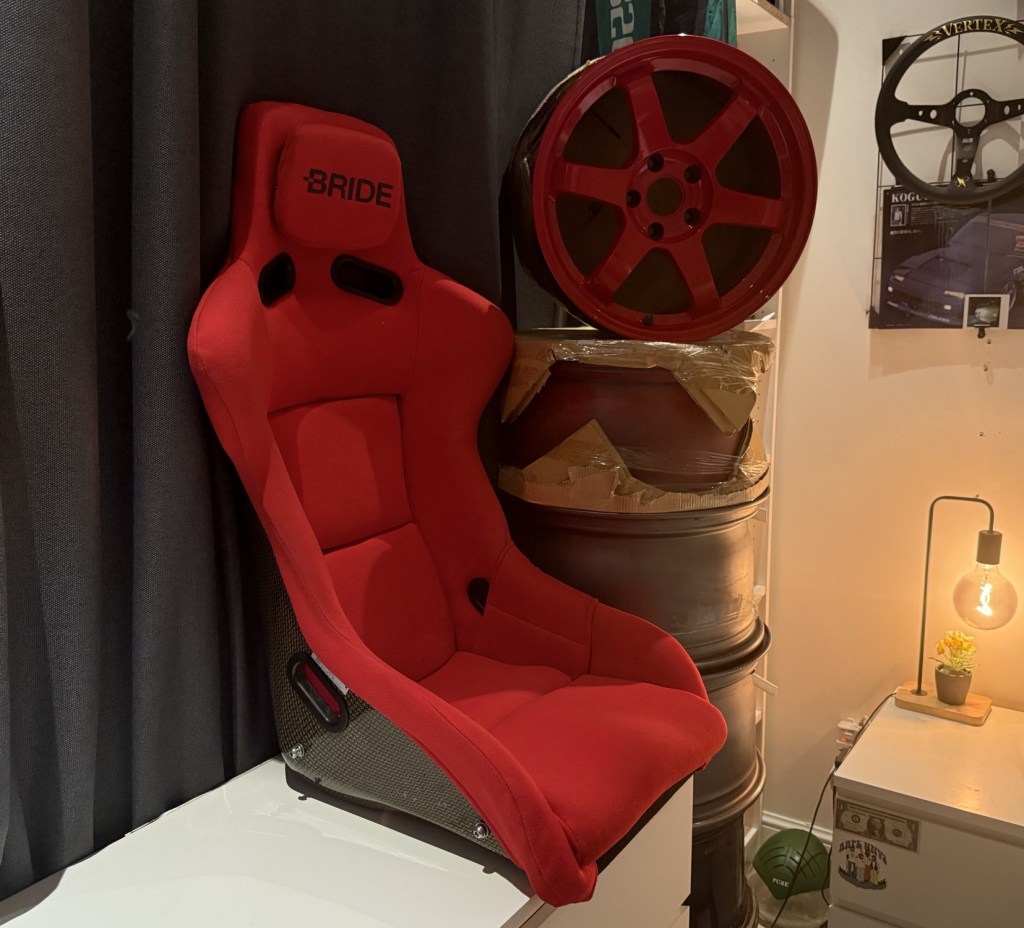
First off was preparing my new driver seat, a few months back I sold my Zeta II pro type after realizing it’s a Type L, for a while I thought it was a Zeta II Neos, but after taking measurements I confirmed that it wasn’t. This wasn’t a big problem, the seat fits me okay, but the shoulders were always a bit too high for me. I’m not a very vertically gifted fellow, so when I found that out, I knew that switching it for a normal Zeta II would be an improvement in terms of comfort and holding power. Around the same time a beat up Pro Type Zeta II popped up on auction and I won that at a good price, so I took my red fabric off the Type L and sold it in it’s original black fabric to a friend. Happy to say it’ll be going in another s13!
I got my new seat in later and just kept it in storage, and one day while surfing the web I found out that Juran makes “Seat Tune Up Kit”s which consisted of the side cushions and the main bottom cushion, since the new seat was a bit torn up on one side, I thought what the hell, might as well give it a proper refresh before putting on the red fabric. So I ordered that kit and got to it as soon as it arrived.

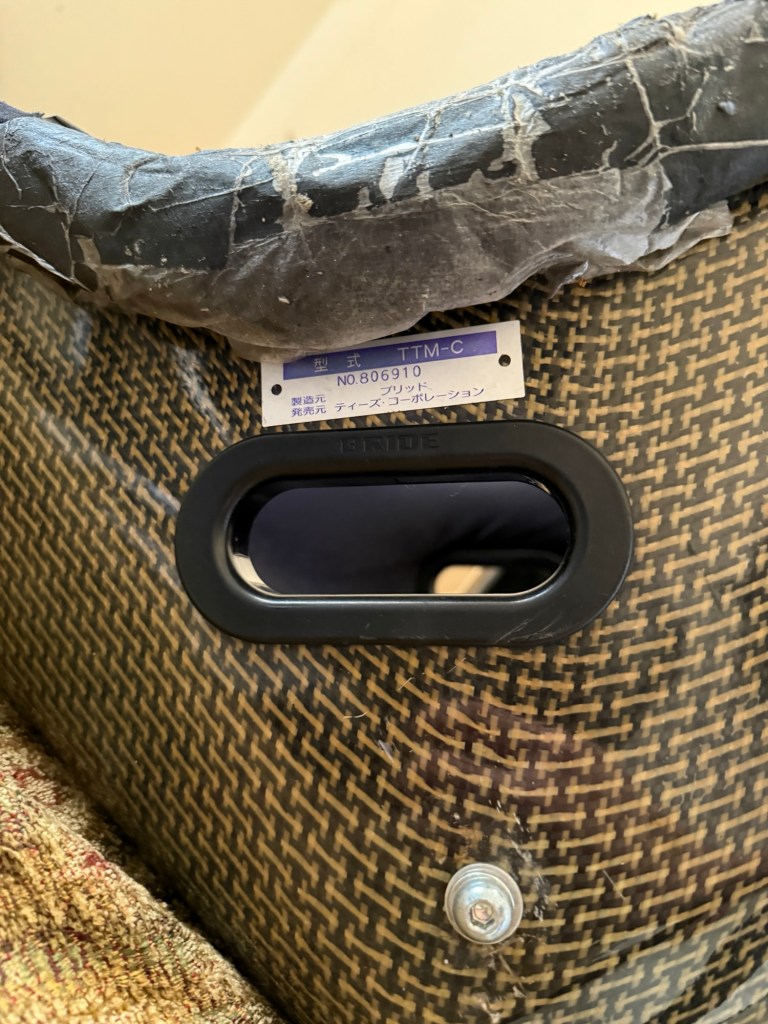
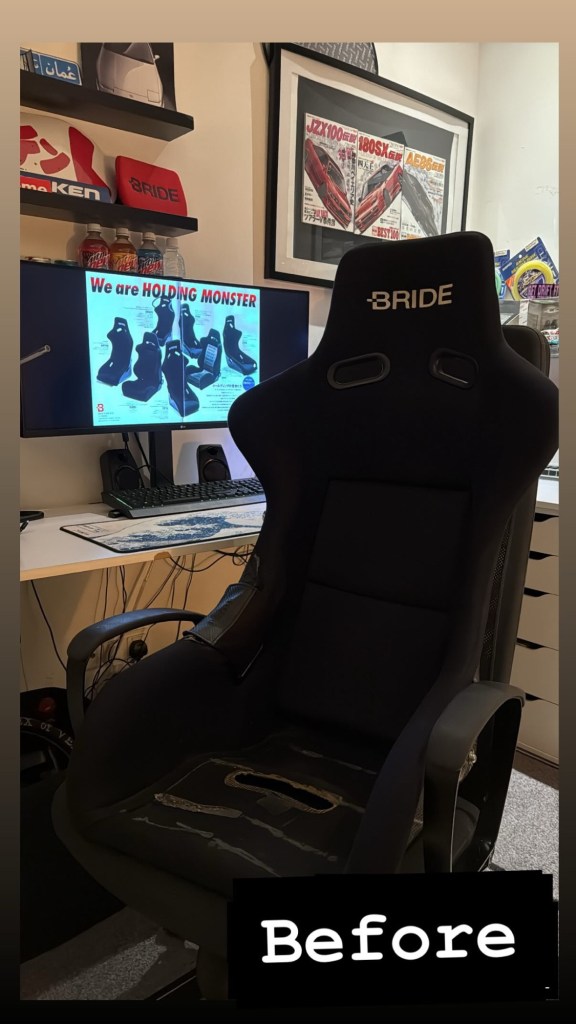
Always fun to unbox a new seat, happy about this one since it was a good deal, it’s a fixer upper though for sure. First got started by taking the old fabric off, it’s pretty torn up on one side, might be savable or used for patches. Or spilt it up to save a different seat, I’m sure I’ll find a use for it someday.
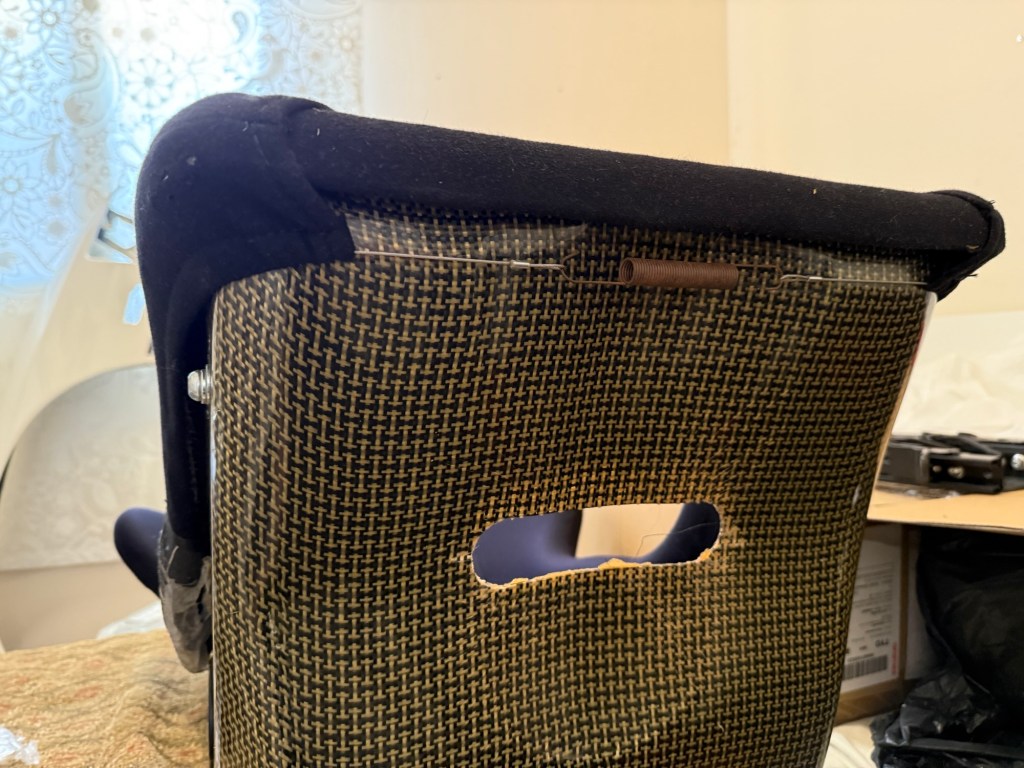

To take the fabric off you simply unhook the spring at the bottom, which keeps the fabric tight on the seat frame, and then unclip the side belt loops, these can break very easily if your not careful.
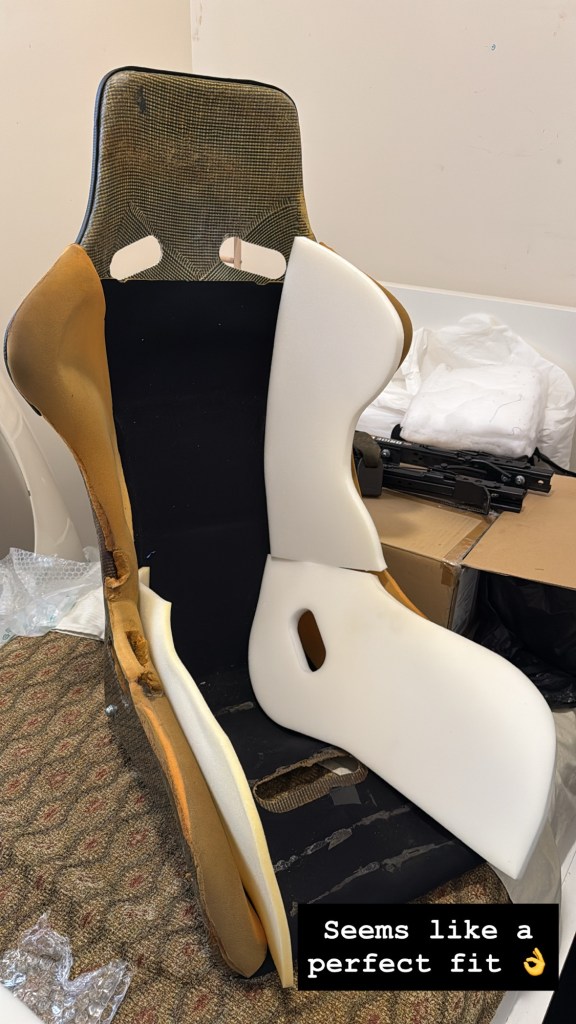
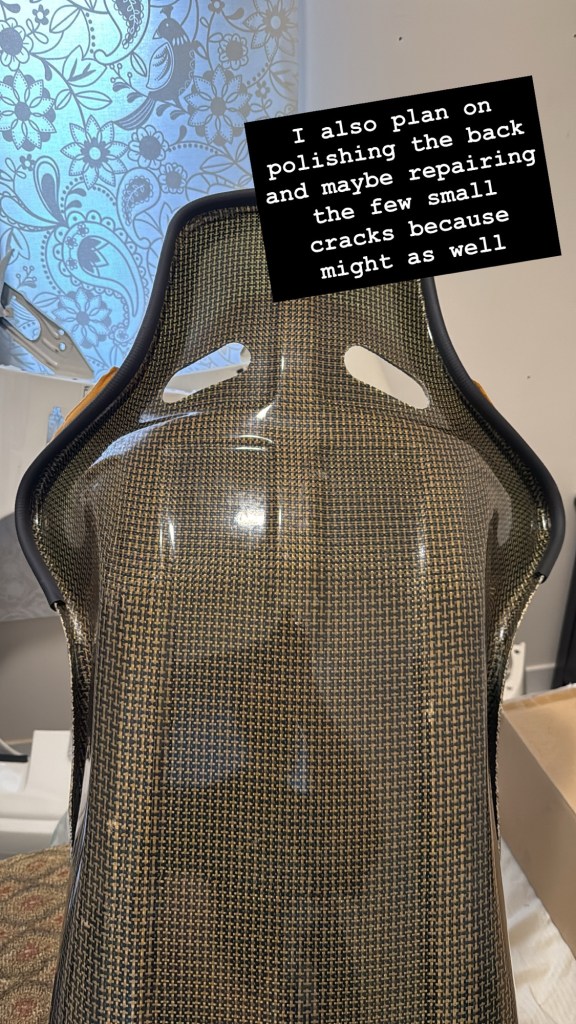
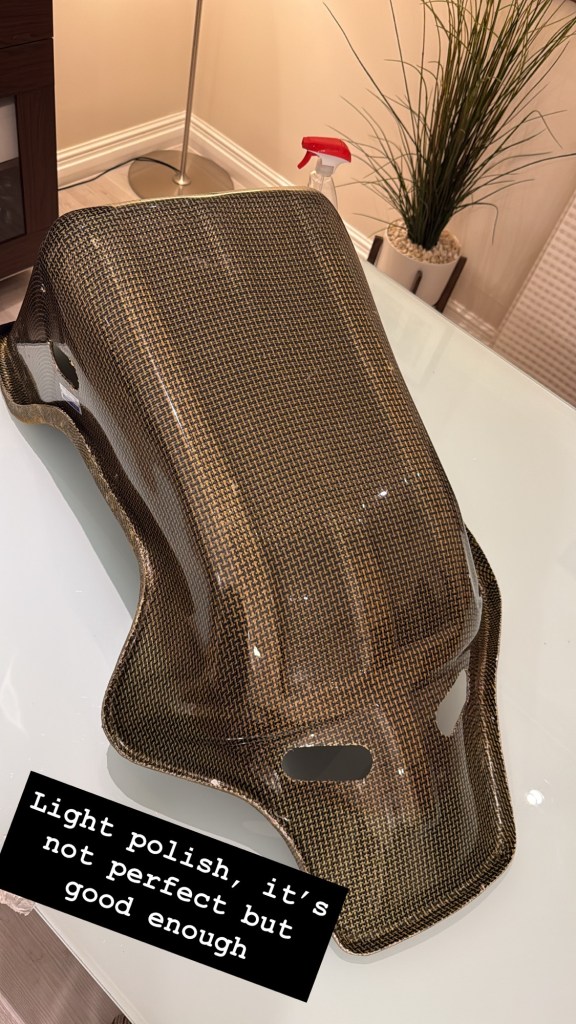
Can see the difference between the old foam and new, and also the difference in color on the Kevlar, it’s originally much more yellow than orange which is interesting. I got the shell polished real quick but nothing too crazy. Next day I cleaned the front and glued in the new foam.

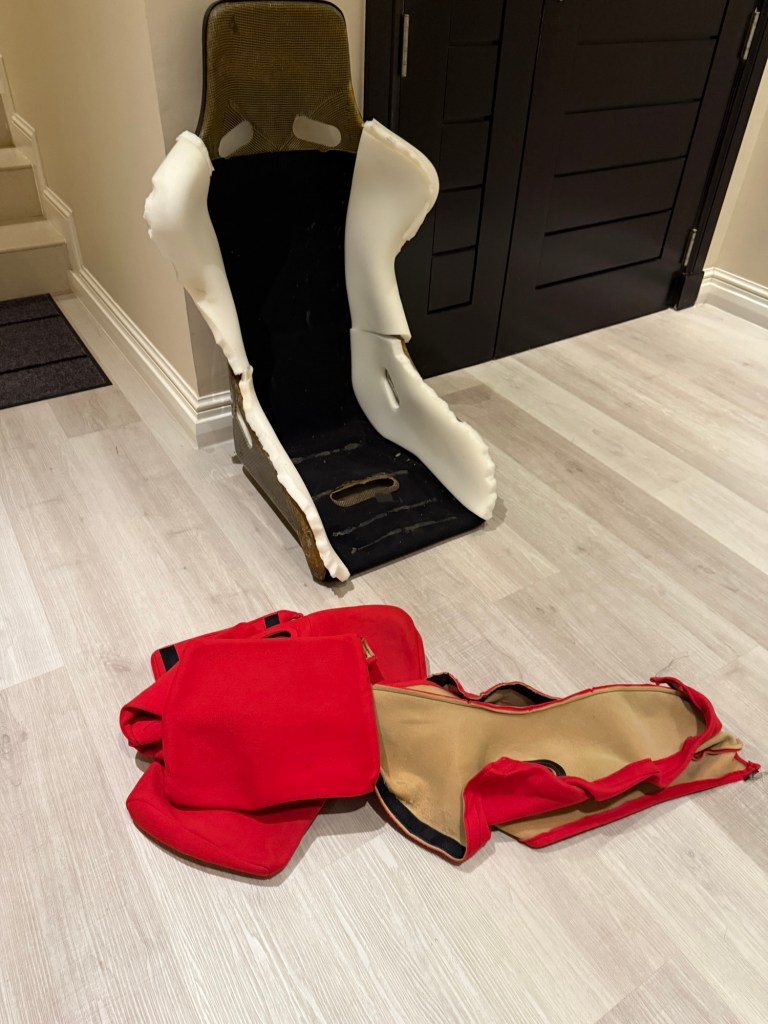
To be honest, I could’ve done a better job cutting the new foam, this is a theme you’ll see a few times in this post, I’m not the best at cutting stuff haha.
This red fabric I won at auction a while back, and used to have it on the Type L seat, which I’m surprised fit as well as it did, it’s possible that all Zeta II models had the same fabric or it’s just stretched enough to look okay. Nevertheless I had it cleaned again and stitched in all new Velcro.


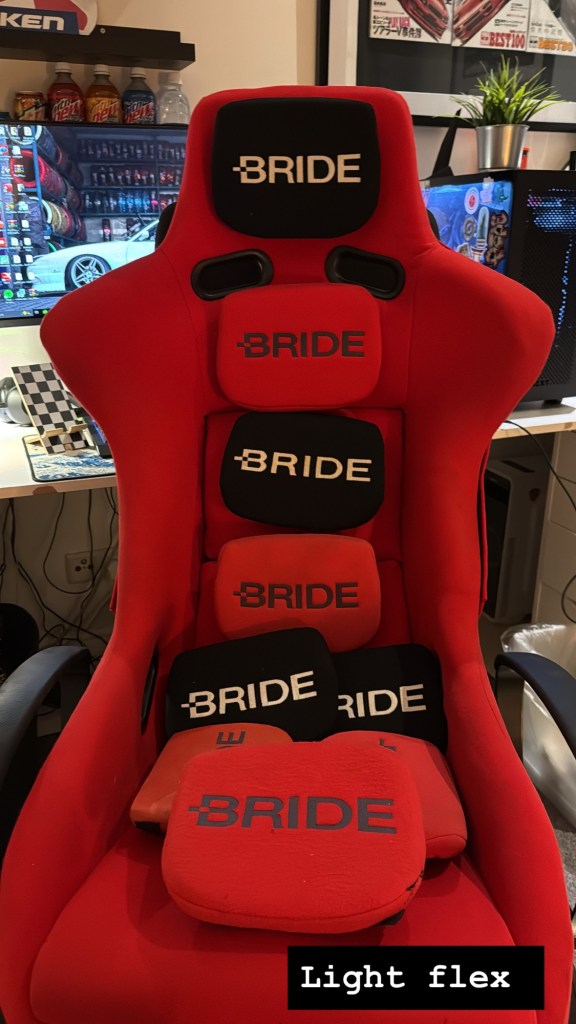
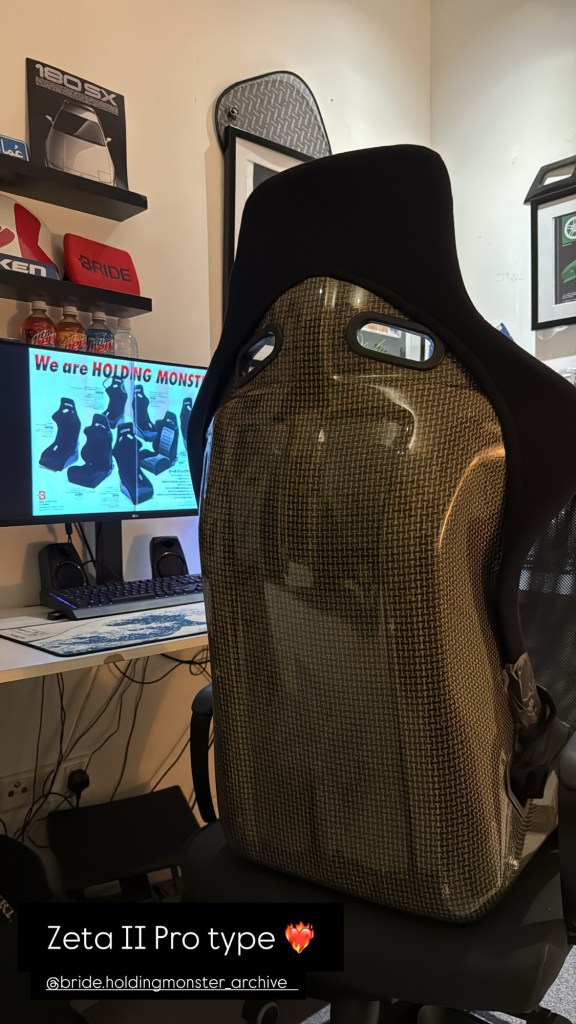
Final result looked great! For some reason not having a driver seat was a bit stressing me out, so getting this done was a nice relief. Will like to see how it feels in the car with the new foam. Won’t be driving in it anytime soon, but I did use it as a desktop chair for a bit and it felt great!
Onto the next small project, after the seat was done I felt some motivation and finally got the courage to cut up my bumper for the R33 N1 vents, I’d bought myself a set of oem ones a while back and paint matched them when I painted some of the car earlier this year. these oem ones come with clips that help so they hold better, but that also means the hole for them has to be the right size or they wont be of much use. I looked at plenty of other people that installed them and took measurements quite a few times. I’d like to say it went well but… I kind of messed a few things up haha.
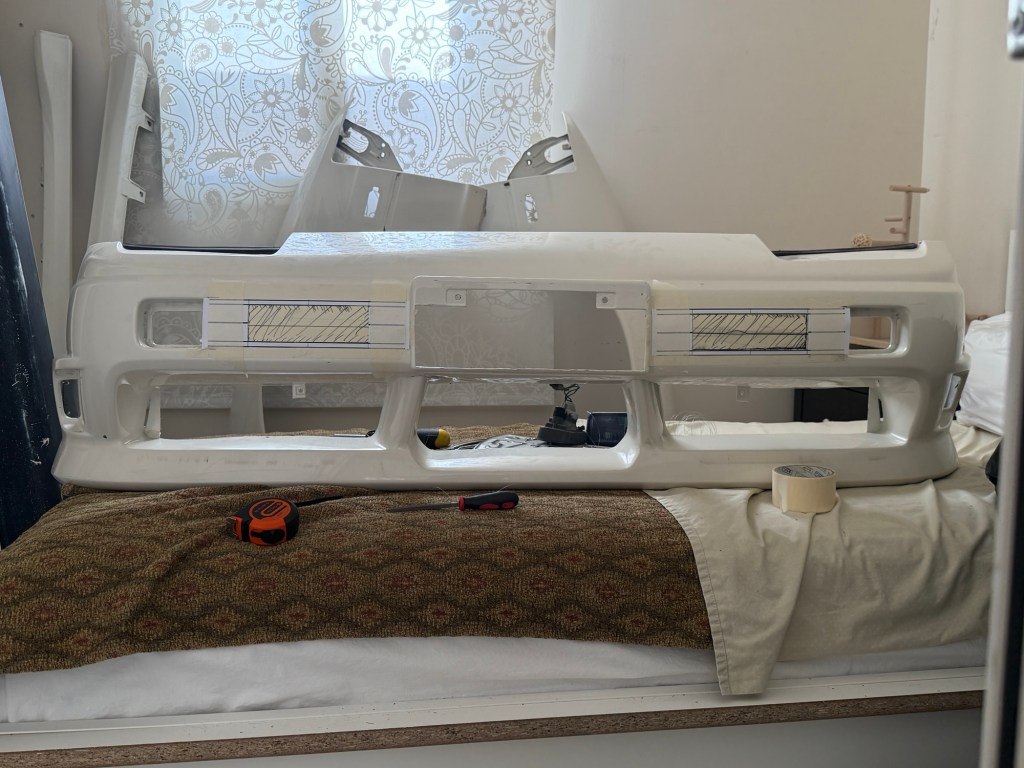
While test fitting one of the vents, it got a bit stuck, and while getting it out it put slightly too much force and cracked the paint, it’s not super noticeable but it pissed me off, my bumper wasn’t perfect though as it had cracked paint and a few scratches since the repaint already, but still, kind of sucks. The vent I starter on first I unfortunately made the hole just slightly too big and because of that, not all the clips were being used. The second vent went better and I got it to fit nicer. The N1 vents weren’t made for the 180, so their shape doesn’t match the bumper exactly, the vertical curve on them is ever so slightly different, which made them have a gap on either the top or the bottom, this was less obvious on the side with the better fitting hole since the clips minimized the gap, but it was more obvious on the other side. I used some 3M tape on both sides because even when new that’s how they are installed. I placed the 3M right on the edge and after putting the vents in, I placed a bunch of magazines on top so the weight makes them stick onto the bumper. It kind of worked, but not perfectly. I believe most people mold these in when they get them installed on 180 bumpers. so I think that’s the plan once I repaint this bumper later on, but for now it looks good enough lol.


This season I’m putting less emphasis on the exterior and bodywork, I’d like to get the swap done, tested, and beat the car up a bit and have fun before getting the exterior all refreshed and clean, so I’ll try my best to not let it drive me crazy.
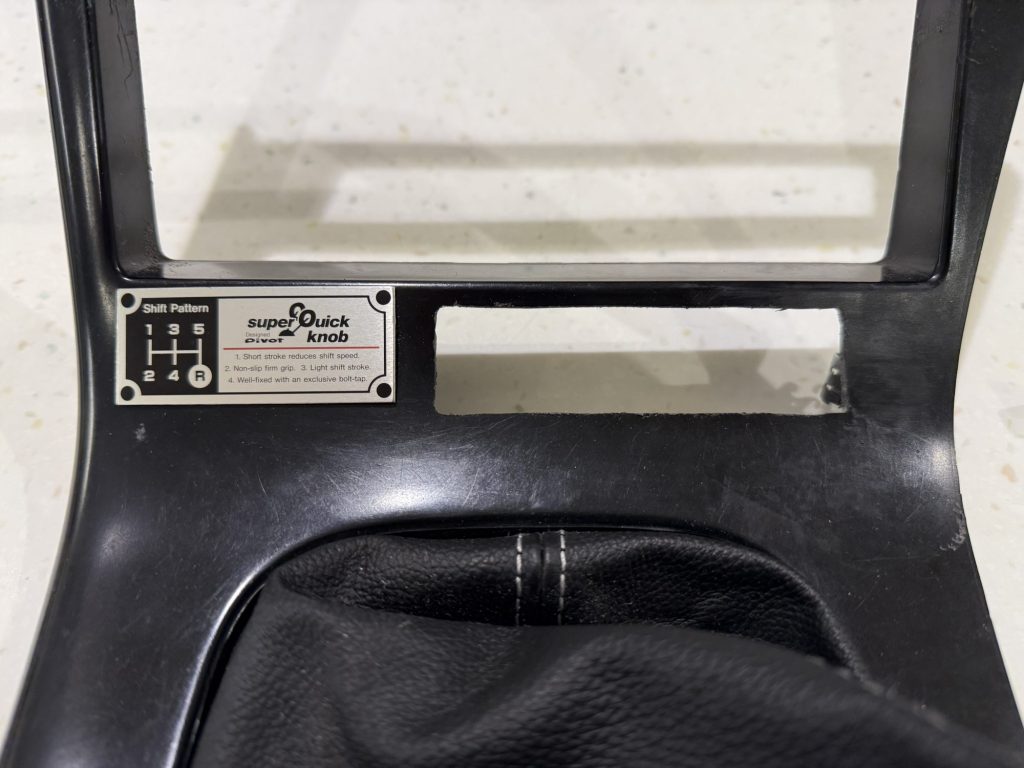
Next thing on the list was mounting the boost controller, I got an HKS EVC-S with the hopes of integrating it into the center console bezel, this definitely required even more precision than the vents, so I took it slow and did most of the finishing touches by hand with a file, I’d say it turned out pretty nice, again not perfect, but nothing is… right?
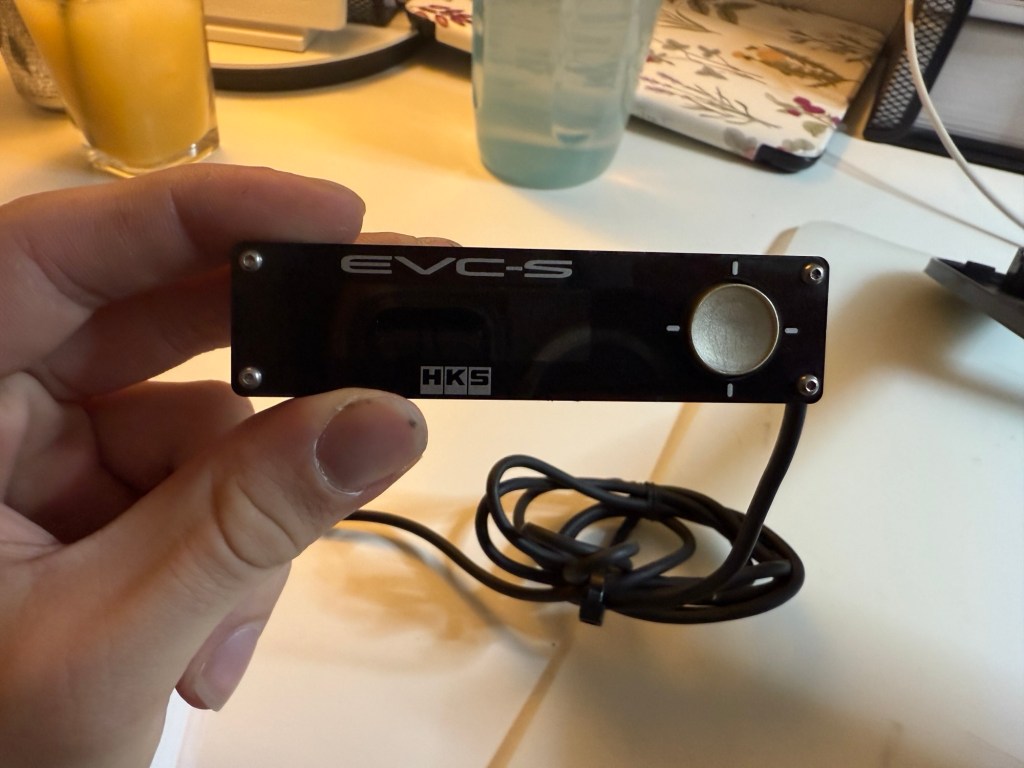
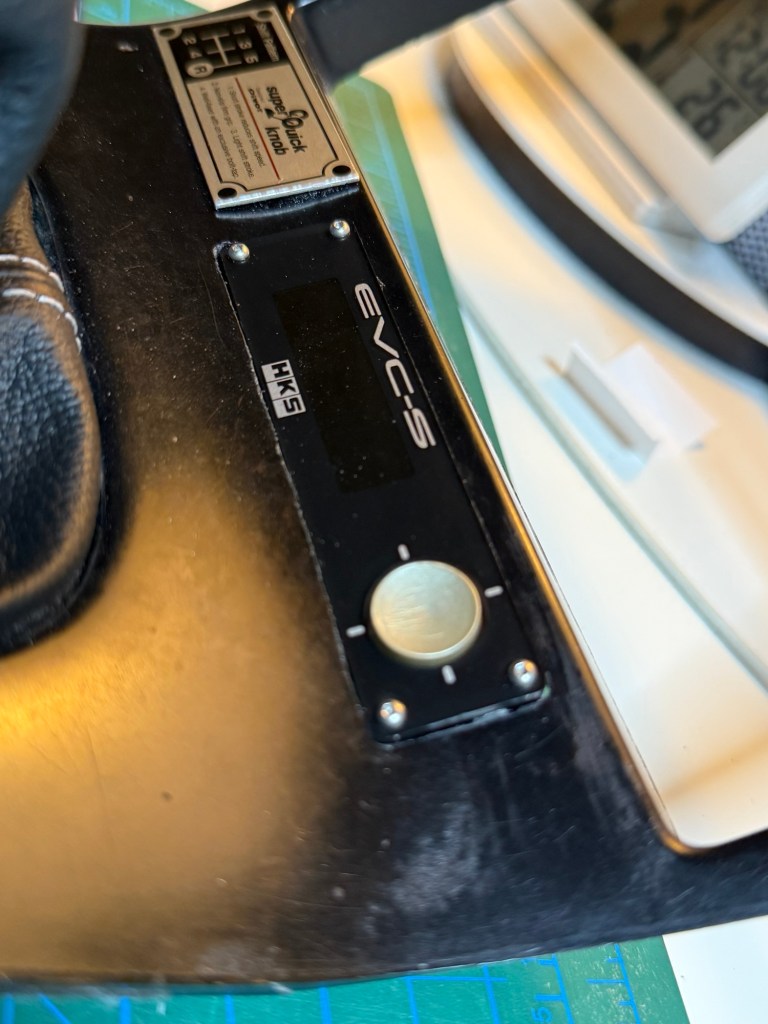
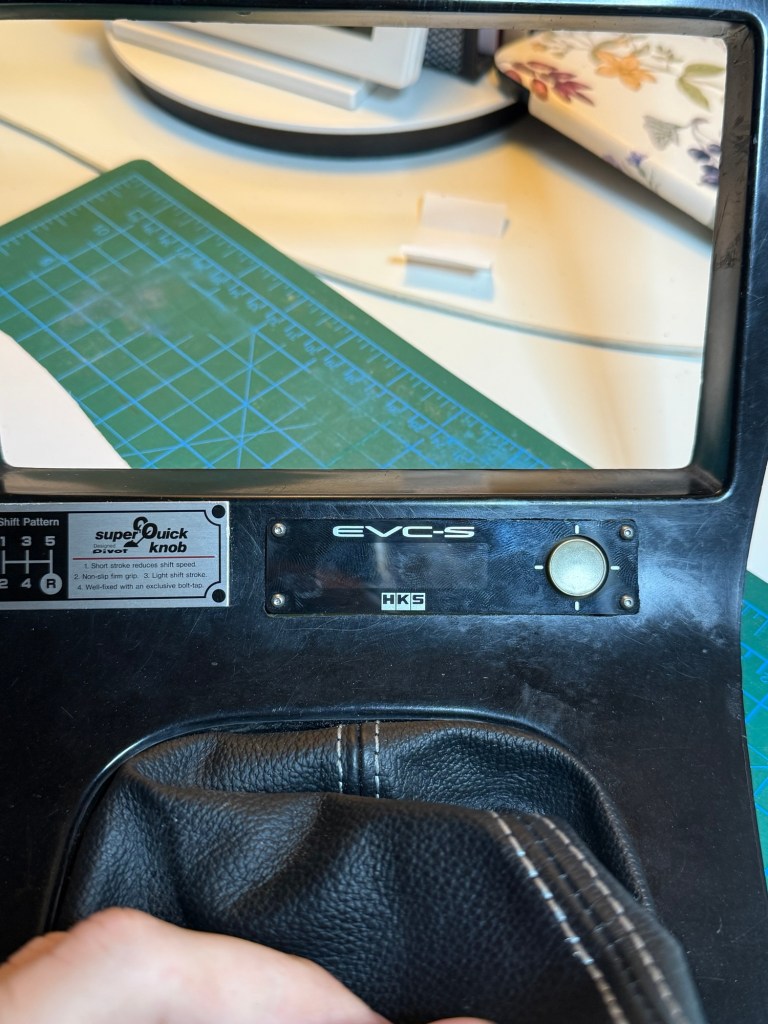
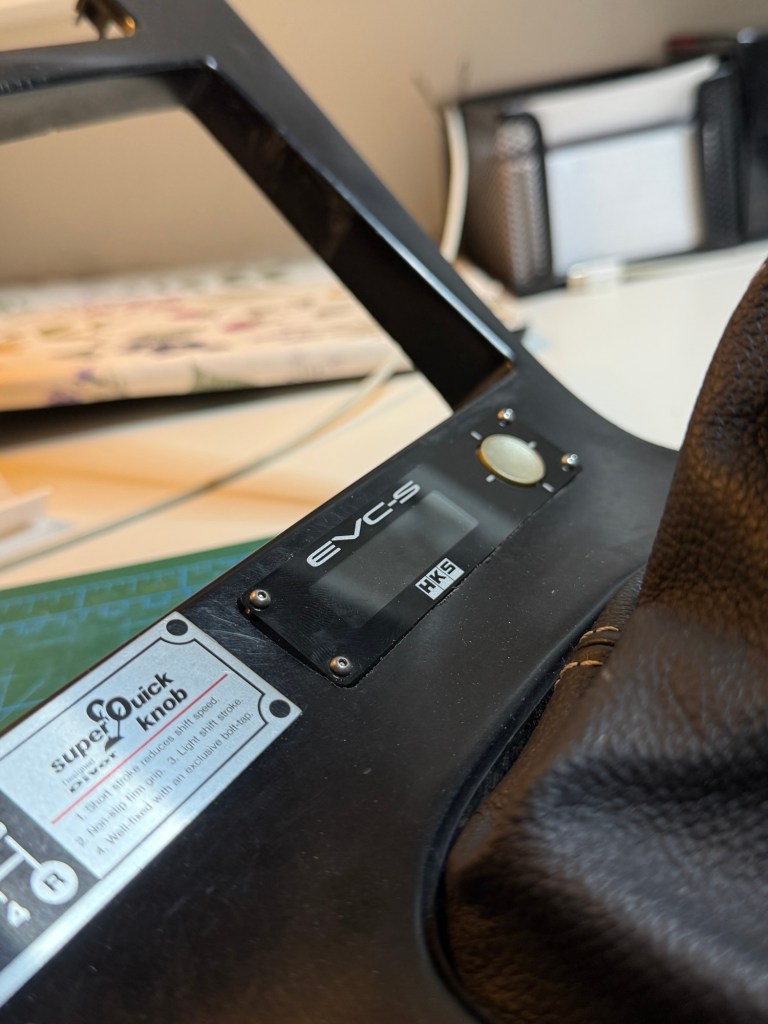
It looks solid. I can still clean it up some more and paint it eventually, but I think it’s good for now, I don’t want to paint the interior bits till I know thry won’t be coming off for a long time, as these plastics get scratched up very easily, and the more you paint them the more sensitive they get I feel.
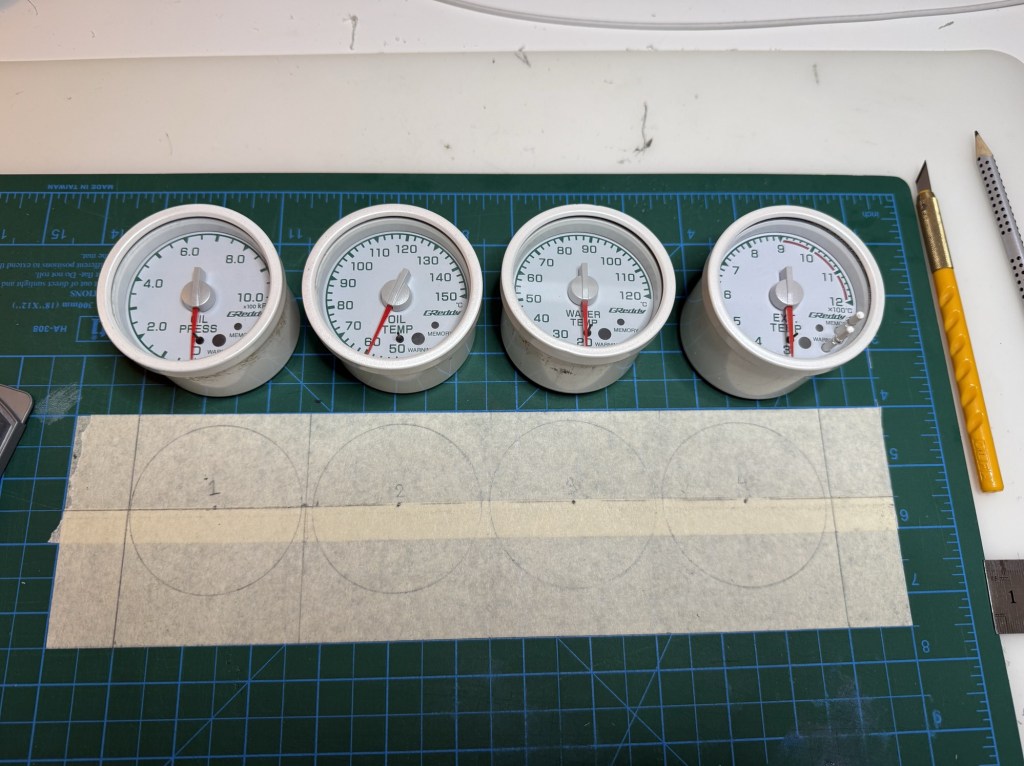
Next up is the dash gauges, another thing I’ve been dreading. Ordered the correct hole saw and asked around for advice. A few friends mentioned going backwards at first to cut the thin leather layer on the dash, before starting the actual cut.
Once I got the hole saw in, I got to it, and made a quick template. The outer diameter of the gauges is 65.5mm, I made the first mark and then spaced out the rest 70mm from each other so all gauges are evenly spaced. Wasn’t that hard just made sure everything was in a straight line.
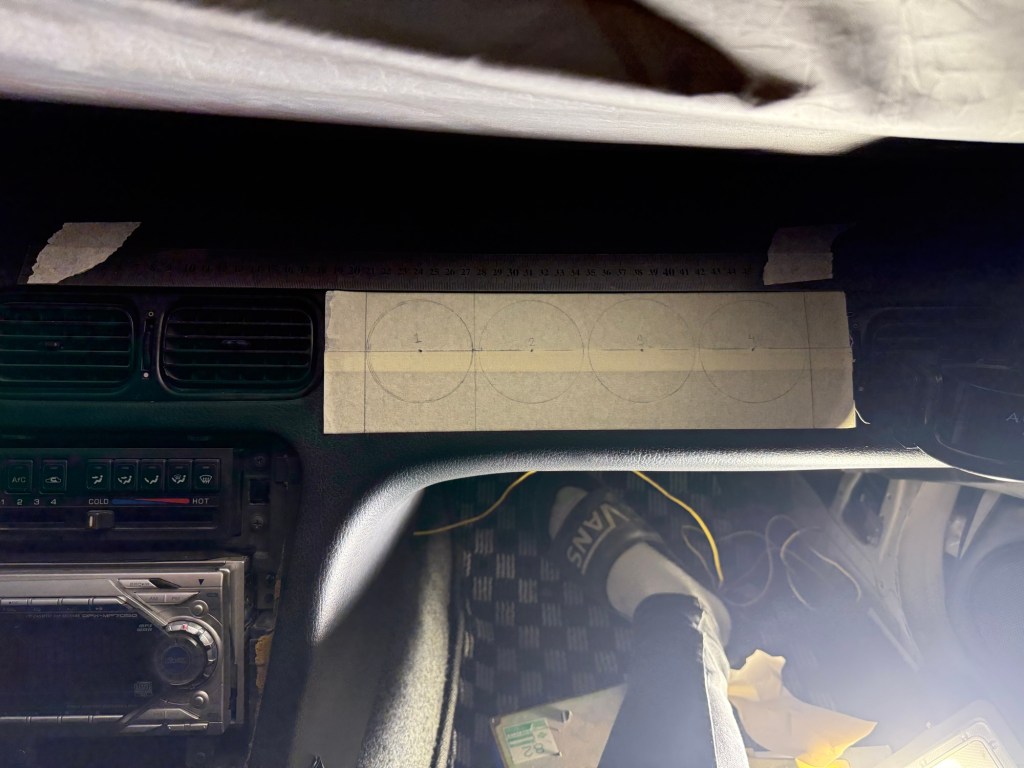
Then I took the template and lined it up on the dash, it’s not exactly in the middle between the two AC vents as there is a metal bracket on the right side which is probably better to avoid, I used a straight ruler to try and get the gauges in like with the center AC vents. Once I had the temple where I wanted, started off with a center punch, and then drilled a pilot hole. And lastly, drilled each hole with the hole saw.
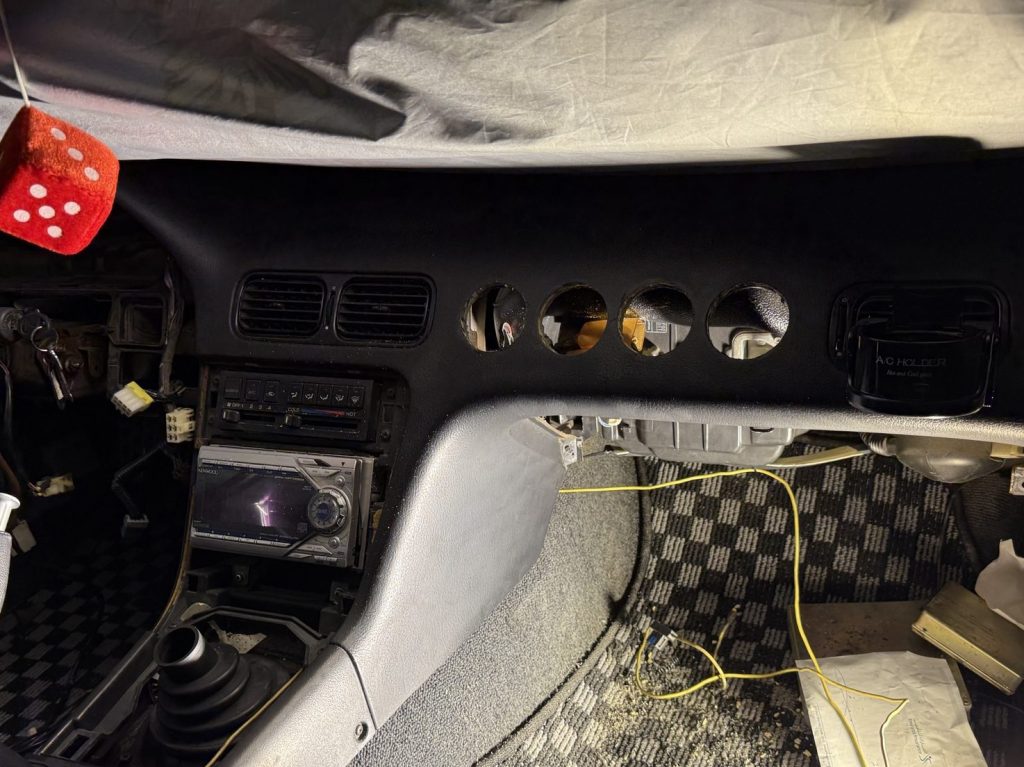
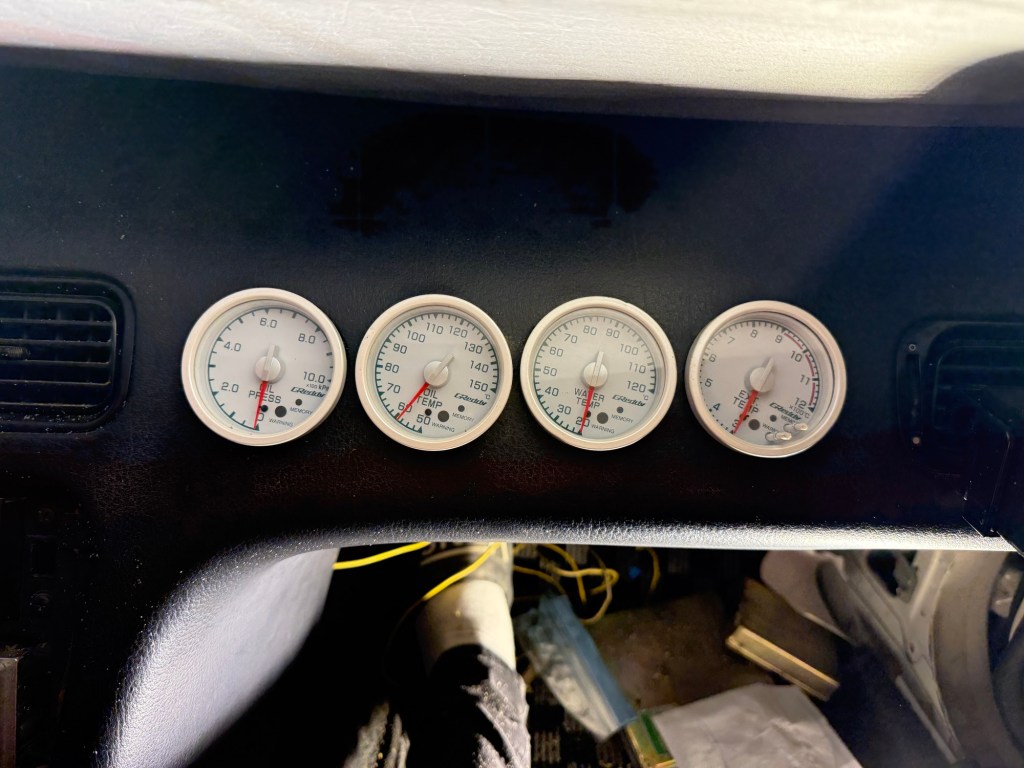
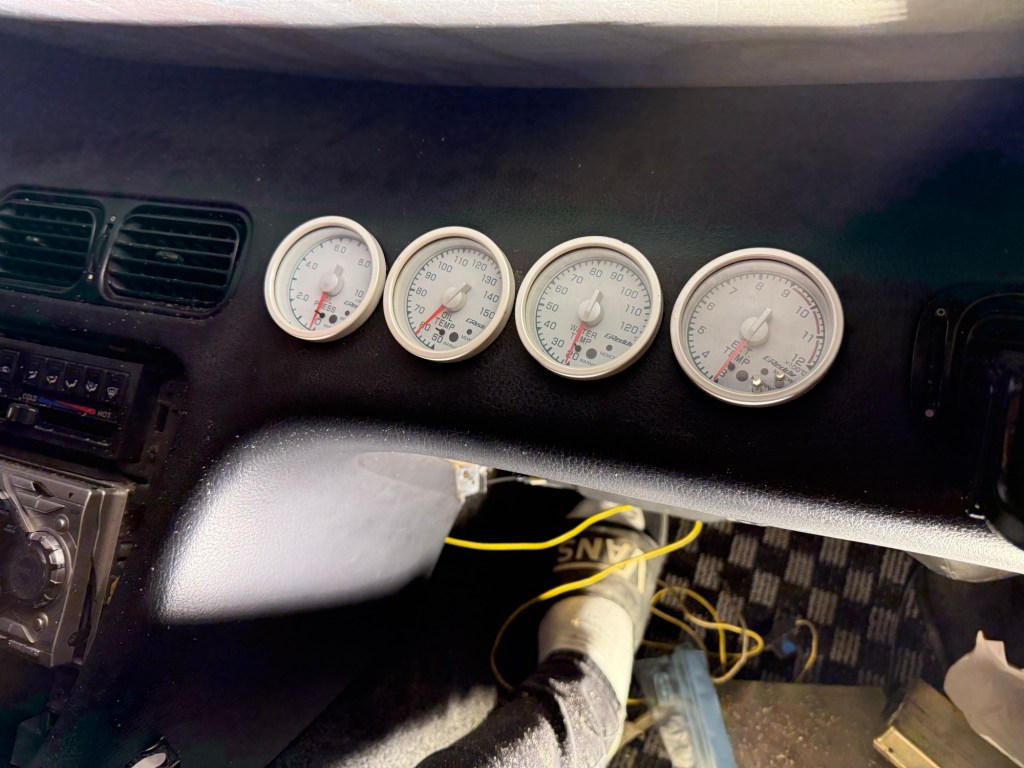
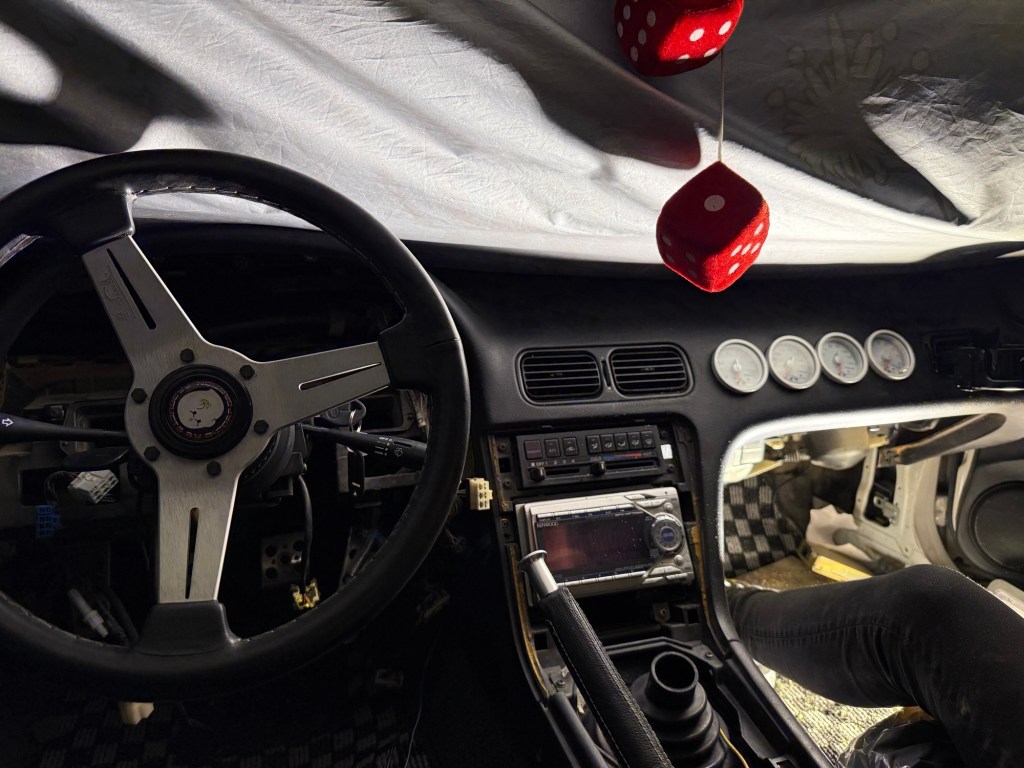
Super stoked on how it looks! Came out pretty good thankfully, a lot could’ve gone wrong but nothing did as its something I always wanted to do but was afraid I’d mess it up. And before anyone mentions it, no the dash was not perfect without cracks. This should not affect the clean S chassis dash economy in any way haha.
That wraps it up till the engine parts get here, once all that stuff is here I’ll start working on the rebuild. Feels like I’m way in over my head before I even started to be honest. But I’ll take my time and try and do things right, got to learn somehow.
Thanks for reading!

Leave a comment