Hay there
Second blog post is here! I’m still behind so this one will be covering all the work I did last month, as the car is currently at the body shop while I’m writing this, will hopefully update on that soon afterwards!
So… where do I start?
I fortunately or unfortunately care a lot more about how a car looks, then I do with how well it handles. And cars look best to me at low, unpractical heights… but that only means that I’m ready to put in more effort to have my car look and preform as good as possible within my current budget. It’s not like it hasn’t been done before, it’s just takes that little bit of extra work to make it happen.
And the first step of having a dialed in car is getting the correct set of coilovers. Coilovers are one of the few parts that can make or break a build, and with this being my first time purchasing a set I wanted to make sure to get something good and high quality. So when I started looking into all the well known coilover manufacturers, trying to choose what to get was quite the challenge. Too many brands nowadays put more work into their marketing than the actual product they make, which could influence a lot of the younger enthusiasts into buying rebranded cheep parts with an extra name brand tax that doesn’t really mean much. And that is a strategy I’m not a fan of.
So sticking with older brands that are actually known for what they do was an obvious choice, and buying from Japan being the easiest option, I had a look at all the ones available there.
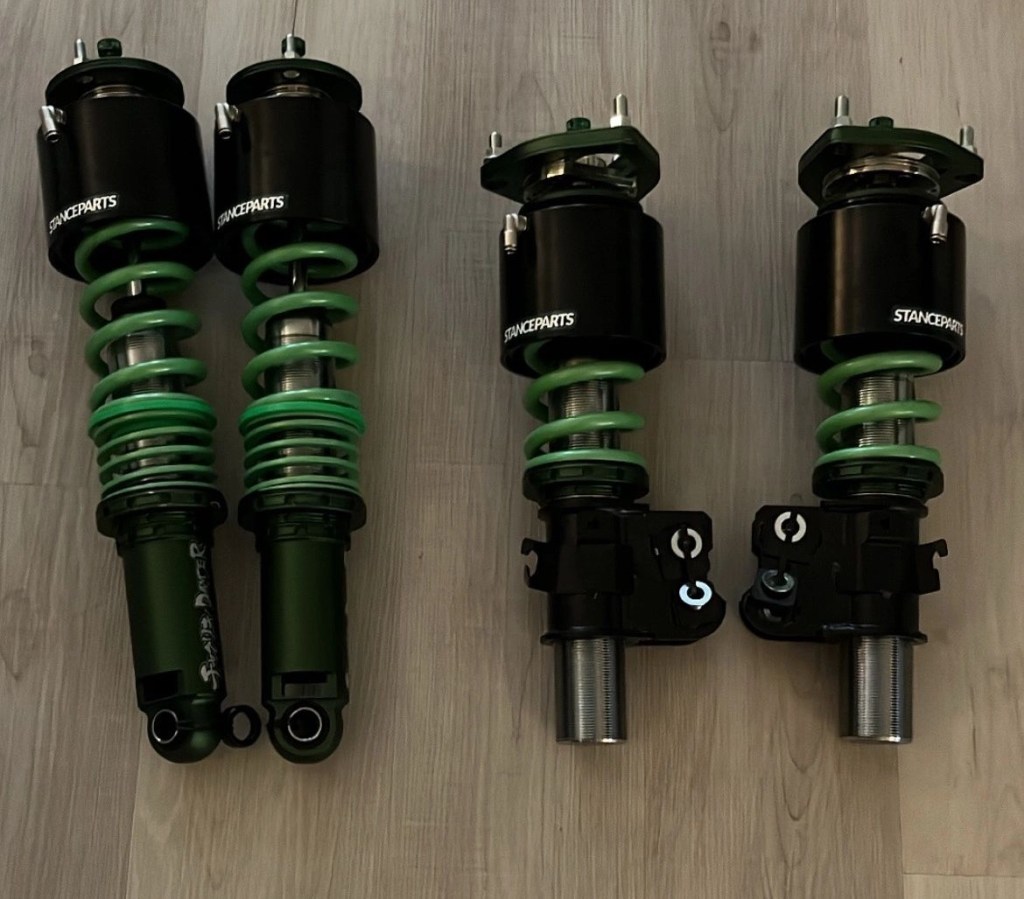
With having a low ride hight being a priority, the choices were narrowed down to a few old school Japanese brands. With the decision landing to go with 326power. They are well known for all the low show/drift cars they’ve built, with the most famous one being Mitsuru Haruguchi (the owner)‘s super low d1 FC RX7, so low drift cars are what they’ve been known for since the golden days. plus I won’t lie… I’m a pretty big fanboy of 326!
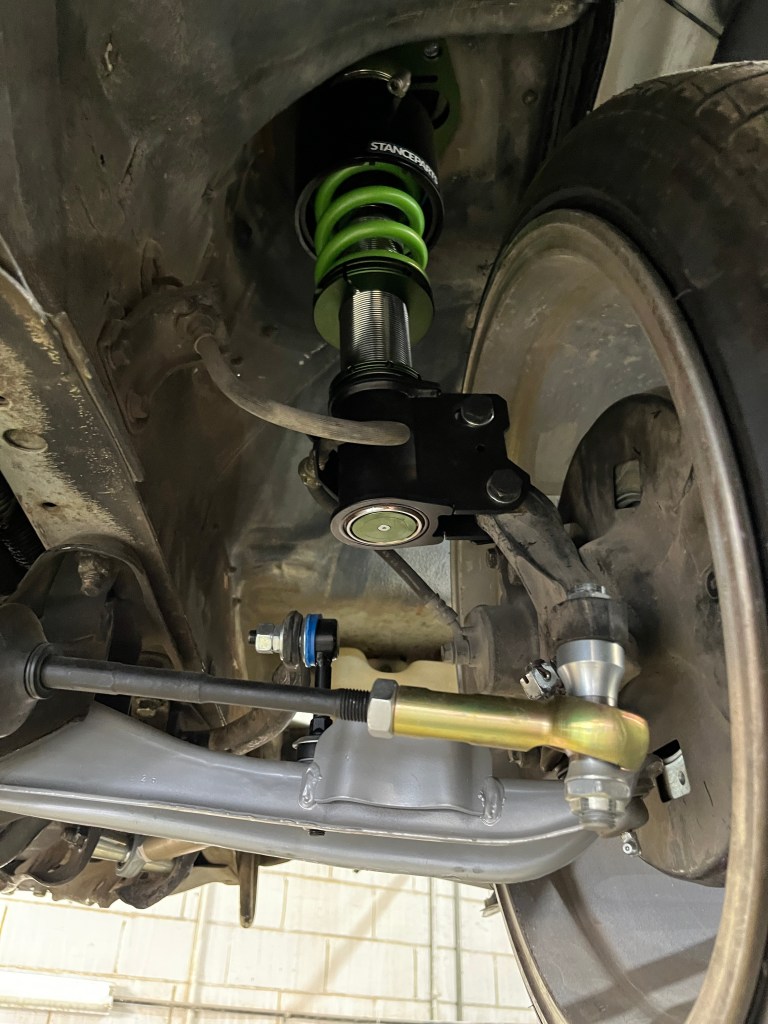
So I started figuring out what setup to go with, and I went with their low spec coilovers, using 12k swift springs at the front, and 7k swift spring+2k swift helper spring. Although 326 is famous for their wild colored coilovers; I wanted to keep it simple with their signature all green look.

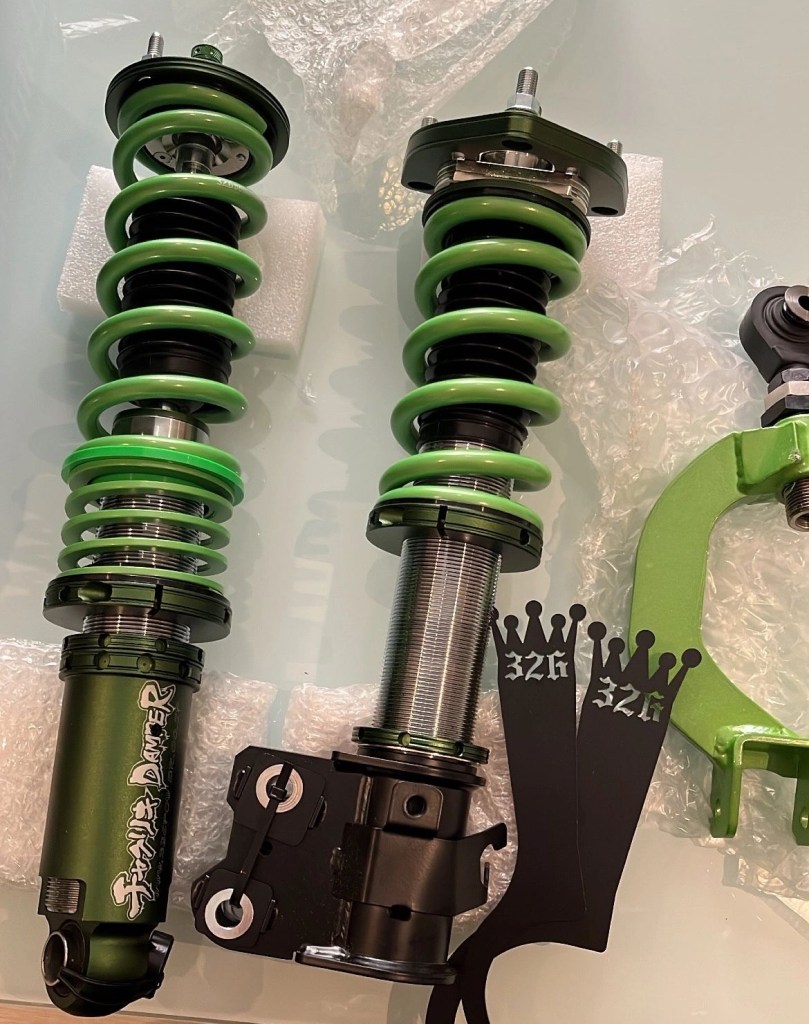
326 does a few things different compared to other coilover brands. -Most notably is their ability to go pretty damn low while still providing good ride quality (will know for myself soon) and they offer a lot of camber adjustment. It’s a bit different depending on chassis but on S chassis you can get up to -8 degrees without extended lower arms! This is achieved by a pretty fancy CNC top plate, and slotted brackets that bolt to the knuckle. The bracket is slotted on both the top and lower knuckle bolt hole with a tab and washer design that keeps the bolts from slipping with harsh driving.
All 326 power coilovers are hand made in Japan and are made to order. I placed my order for these through @jessestreeter94 who made the whole process very simple.
I ordered the coilovers in my desired spec plus a set of 326 rear upper arms which are also designed to be low car friendly.
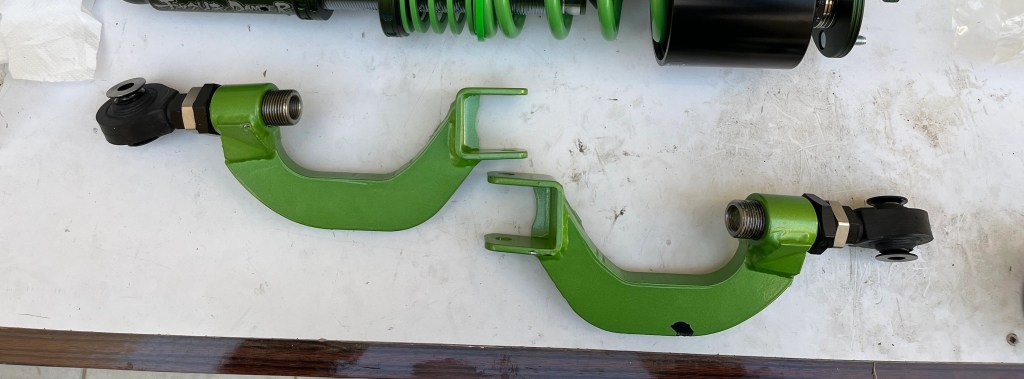
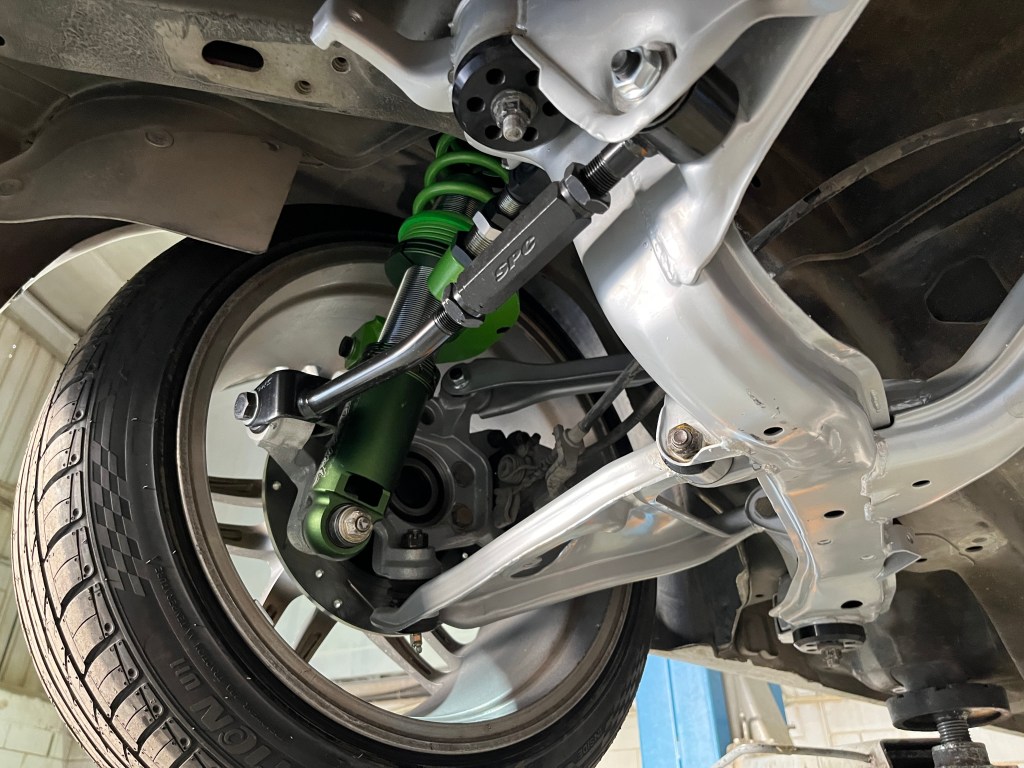
I also ordered a set of Ikeya Formula tie rod ends, and a set of front tension rods, both come in their signature gold zinc coating.

And the rear factory tow arm was replaced with an SPC tow arm which might be temporary. since the toe arms I wanted were out of stock.
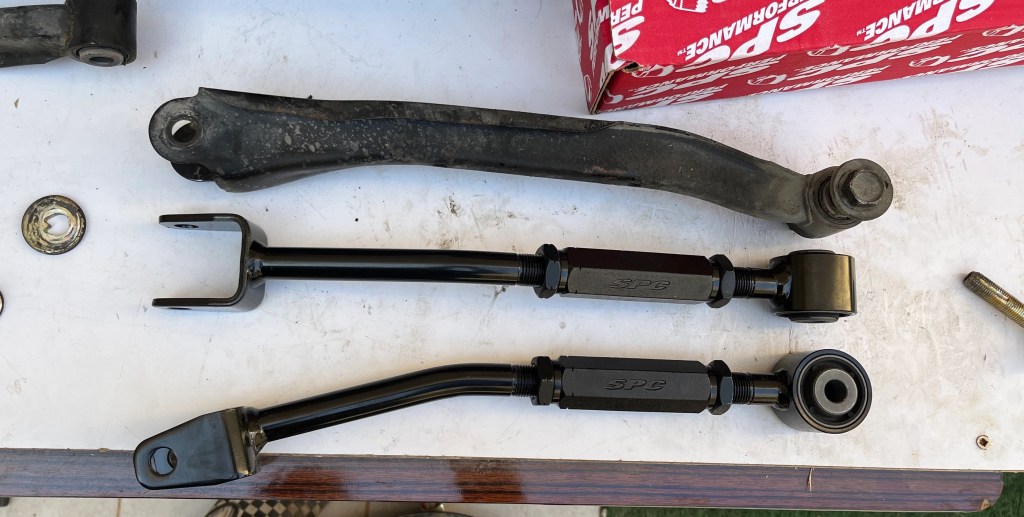
I kept the front and rear lower control arms stock but with fresh poly bushings, and same with the rear traction rod.
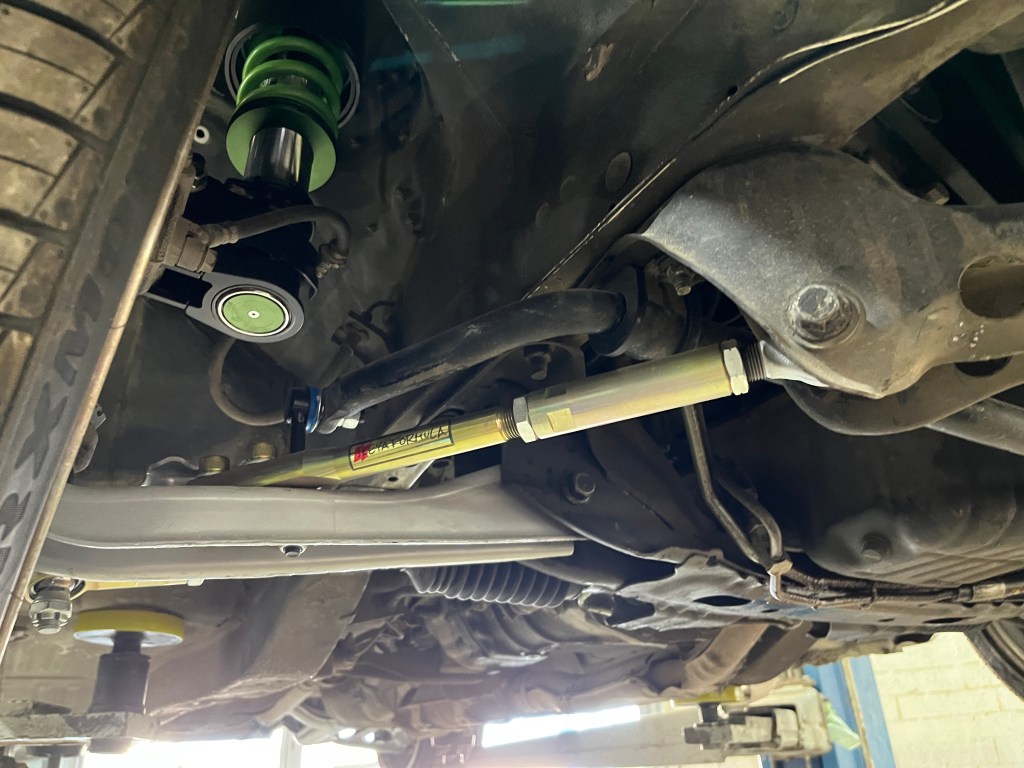
As mentioned before I did all new poly arm and knuckle bushings for all the parts I did not replace with new ones. And solid subframe raisers in the rear subframe. I did add thin rubber washers in hopes of keeping unwanted noises to a minimum but we will see how that works out soon.
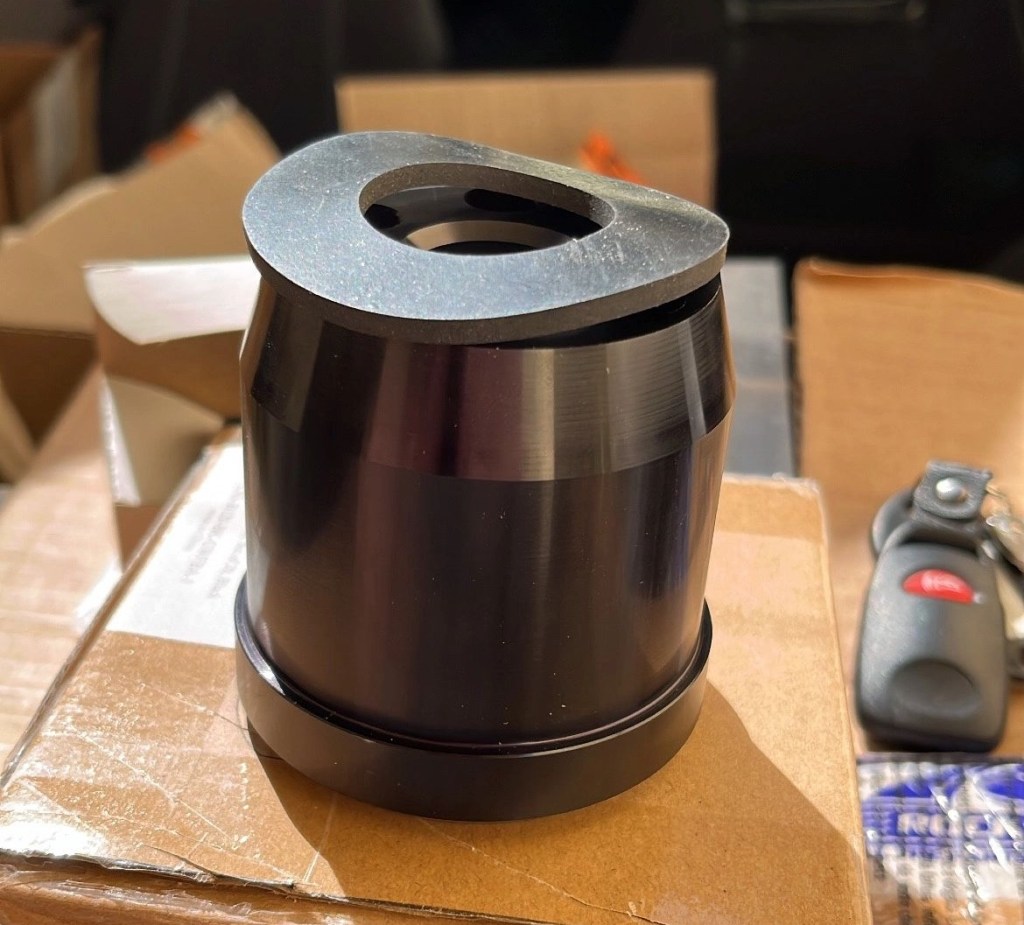
The next big part of the suspension overhaul would be the StanceParts air cups system, I decided to go with air cups this time around instead of air suspension for a few reasons.
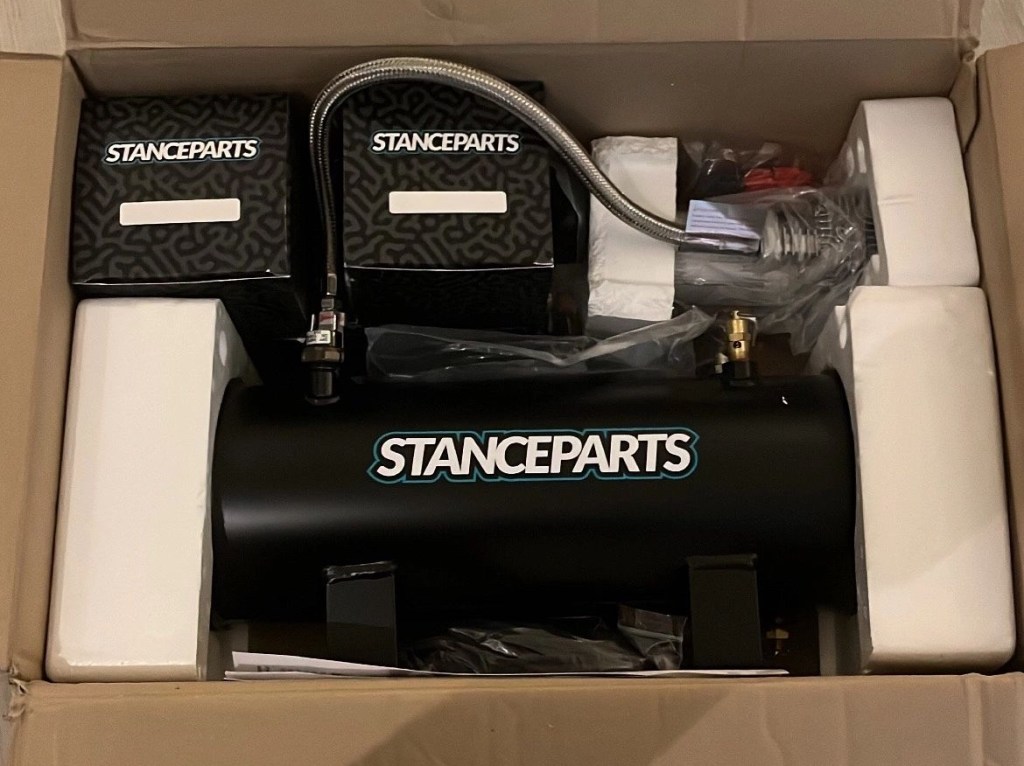
-simplicity, less electronic parts that could fail, fewer lines that could leak and a smaller footprint in the cargo area.
-better handling, although air suspension could be setup to handle just as well as coilovers, it is harder to nail right since it’s difficult to keep a consistent spring rate due to changes in air pressure and temperature.
-drivability at low ride hights, again this could be done on air suspension but would require a great deal of tinkering to be as good. The problem with air suspension is that it is usually too soft and bouncy at low ride hights. Which means the car wouldn’t preform as good (potentially worse) at my desired hight.
-ease of mind, with the system being independent from the rest of the suspension, it means that even if a part fails the car wouldn’t be stranded/undrivable
They do however have a few disadvantages though, less lift for clearing obstacles and limited to lower speeds at full lift.
With that said, I’m going to test them and see how I like them, and if they don’t meet my expectations I can easily covert the 326 coilovers to use air bags and have air suspension without too much hassle.

Getting all the new front suspension parts was a walk in the park, I did however install the coilovers backwards first lol.

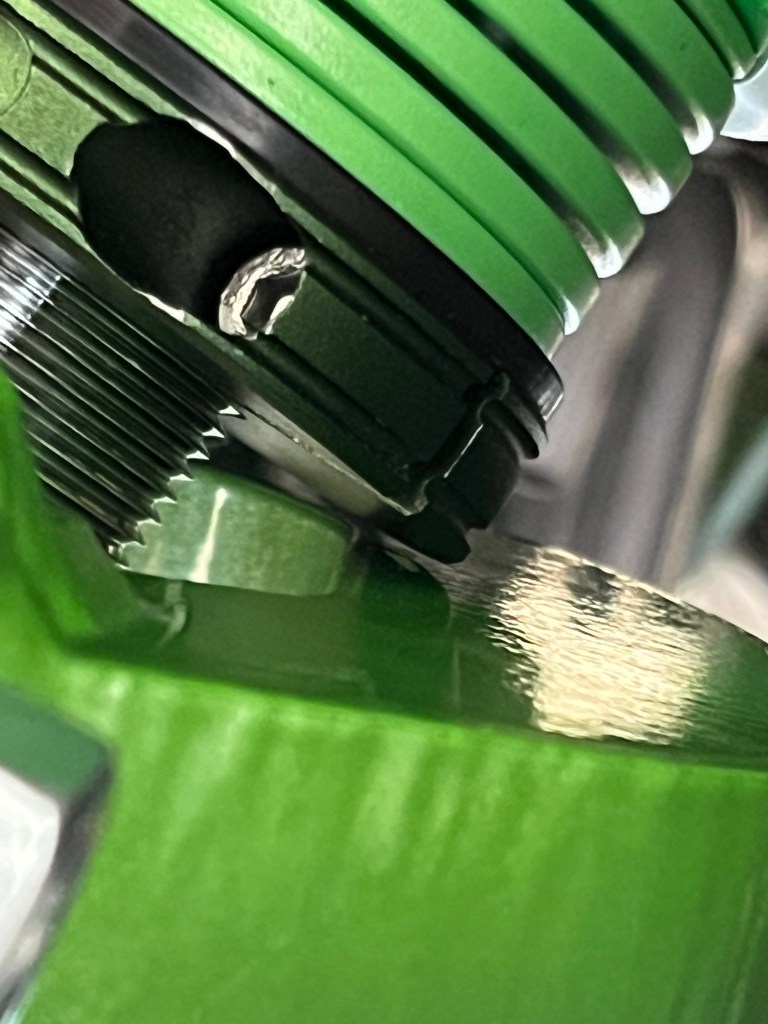
I ran into a bit of a problem with the rear coilovers. The lower collar would contact the upper arm since the whole spring assembly had to be lowered by 30mm approximately for the air cups to sit where they should. I temporarily decided to compromise the helper spring (making it useless for now) to create some room between the collar and arm. I will fix this in the future with a shorter main spring so that helper spring would be uncompressed at full droop and gain a few mm of lift with the air cups.
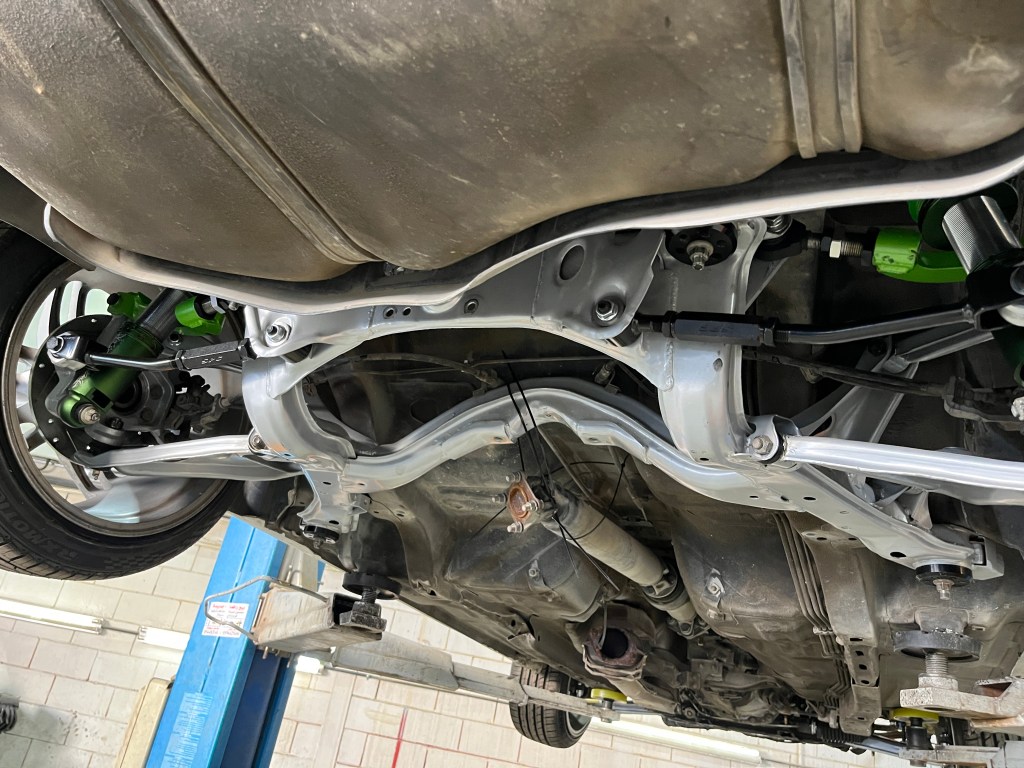
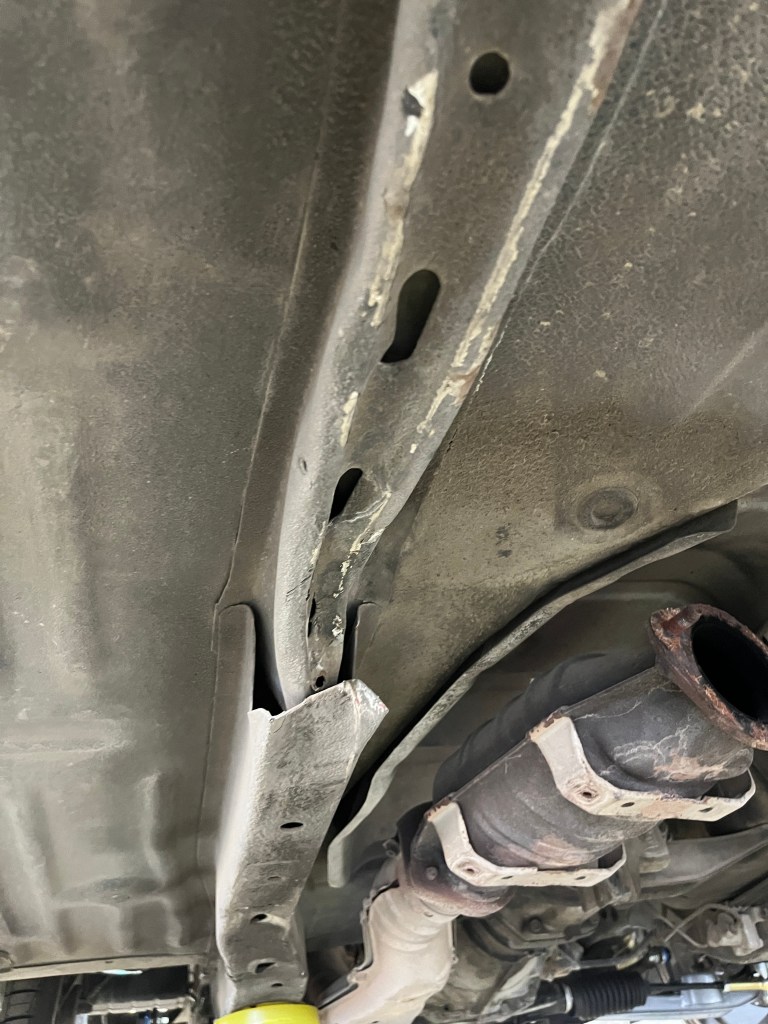
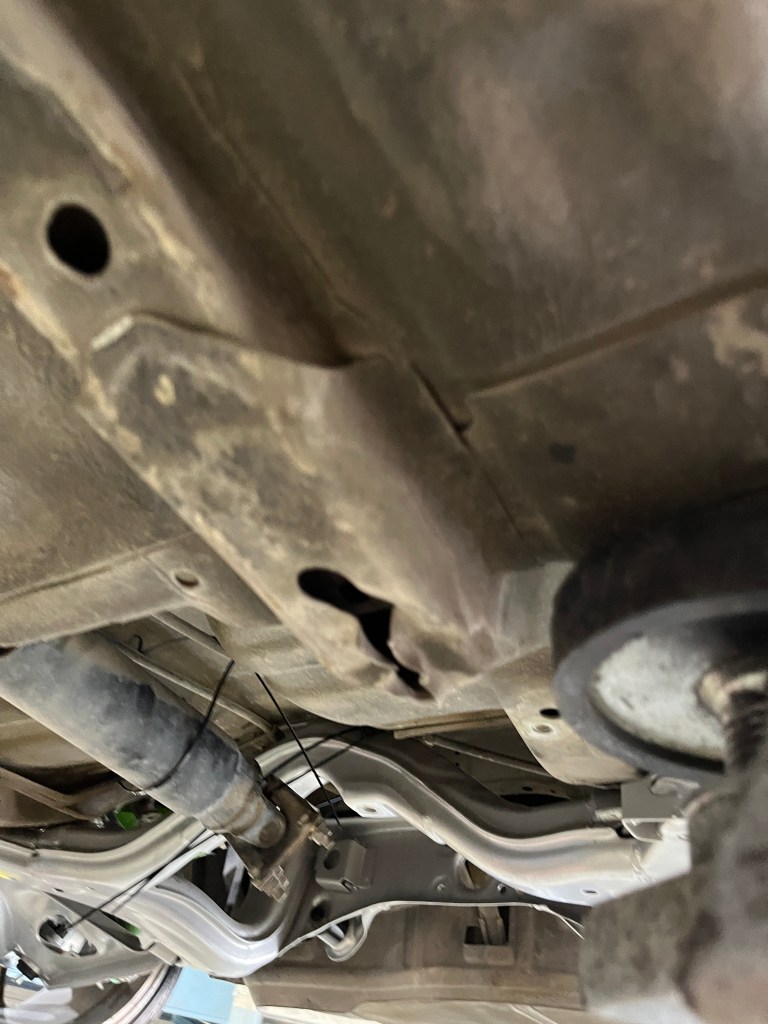
Small photo dump of the underbody, including my destroyed frame rails that will be fixed some time in the hopefully near future.


The management and lines for the air cup system still need to be installed and ran through the chassis, but that will be done once all the body work is done (which is being worked on as of me writing this!)
A few mechanical issues arose after the visit to the shop, but nothing too serious… except for a clunking noise out of the diff/output shafts… The issue will be investigated soon enough and hopefully it’s nothing too major.
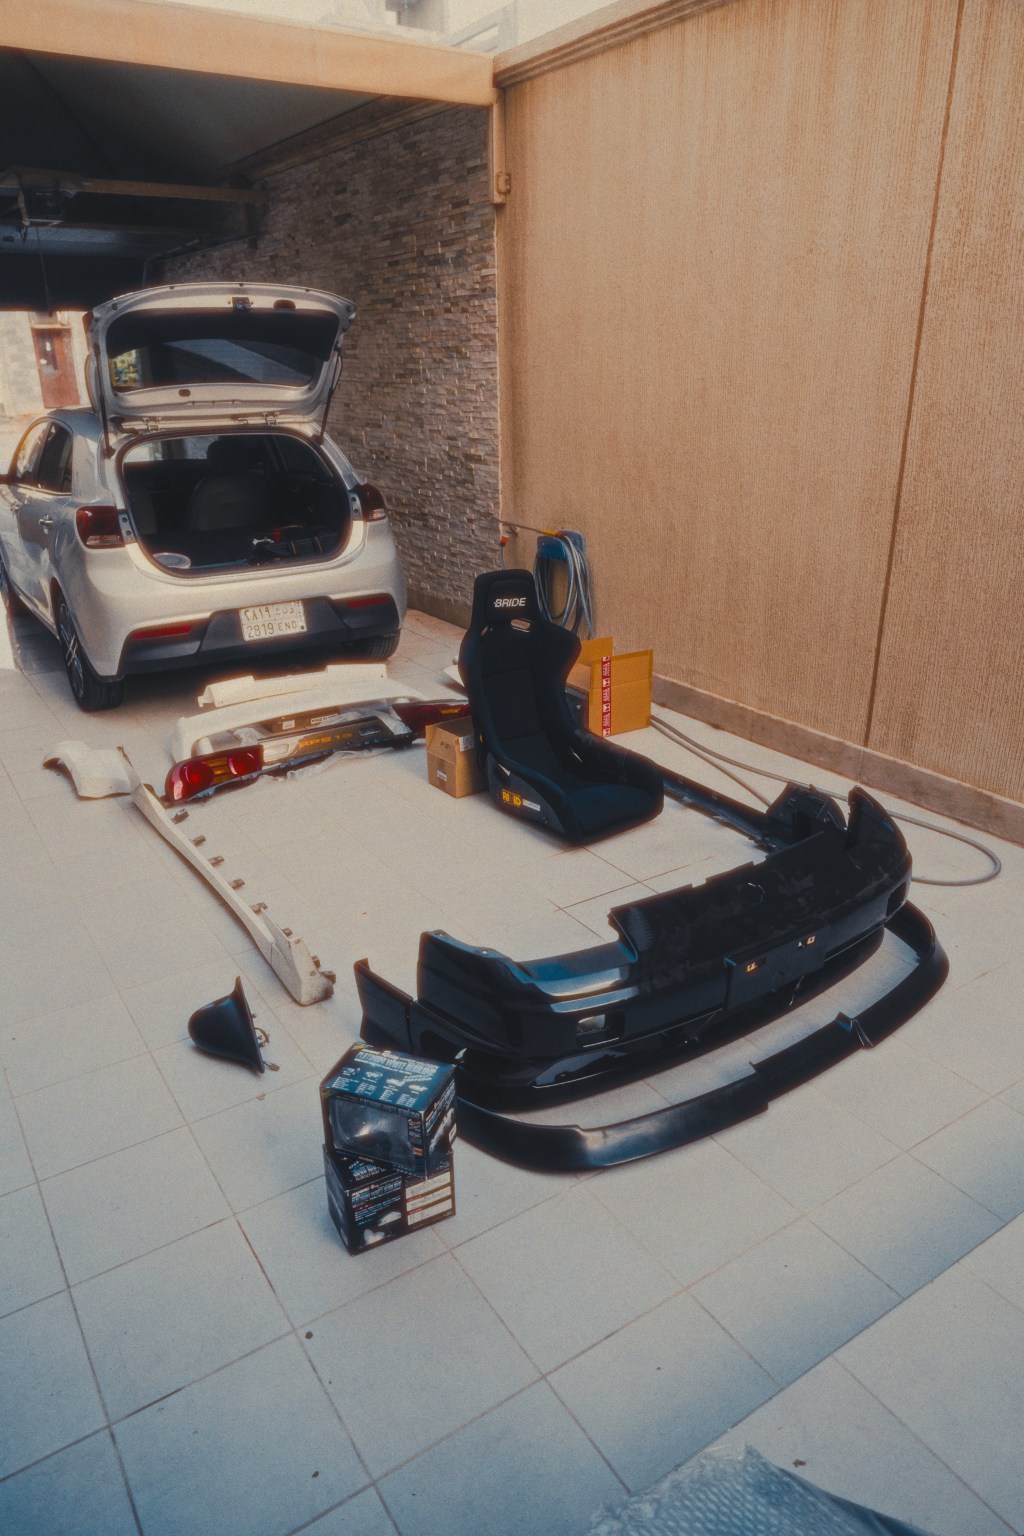
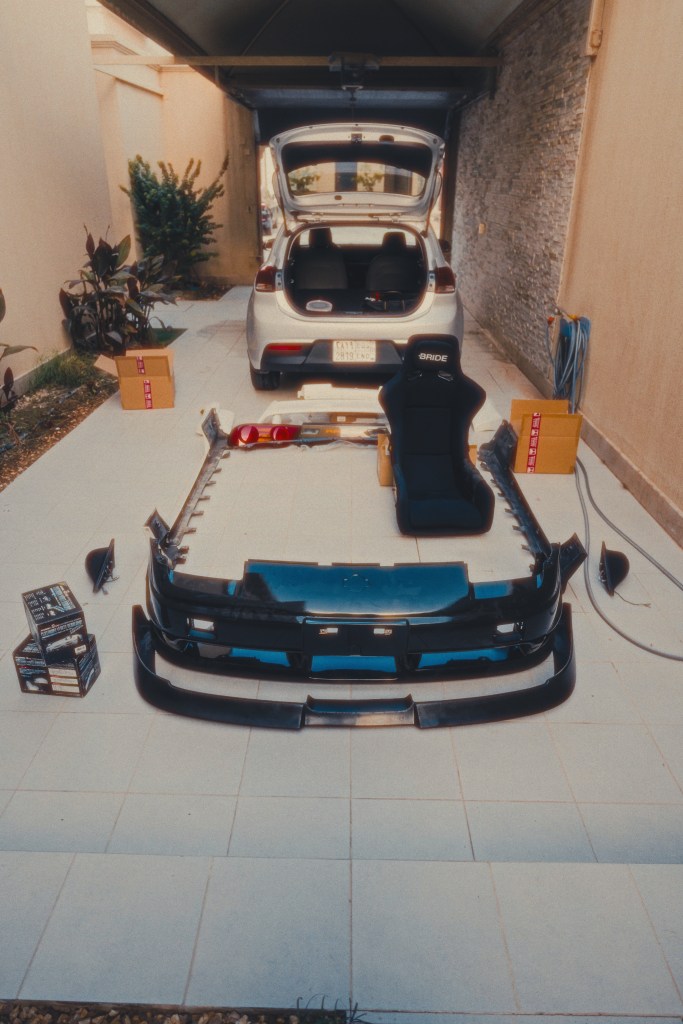
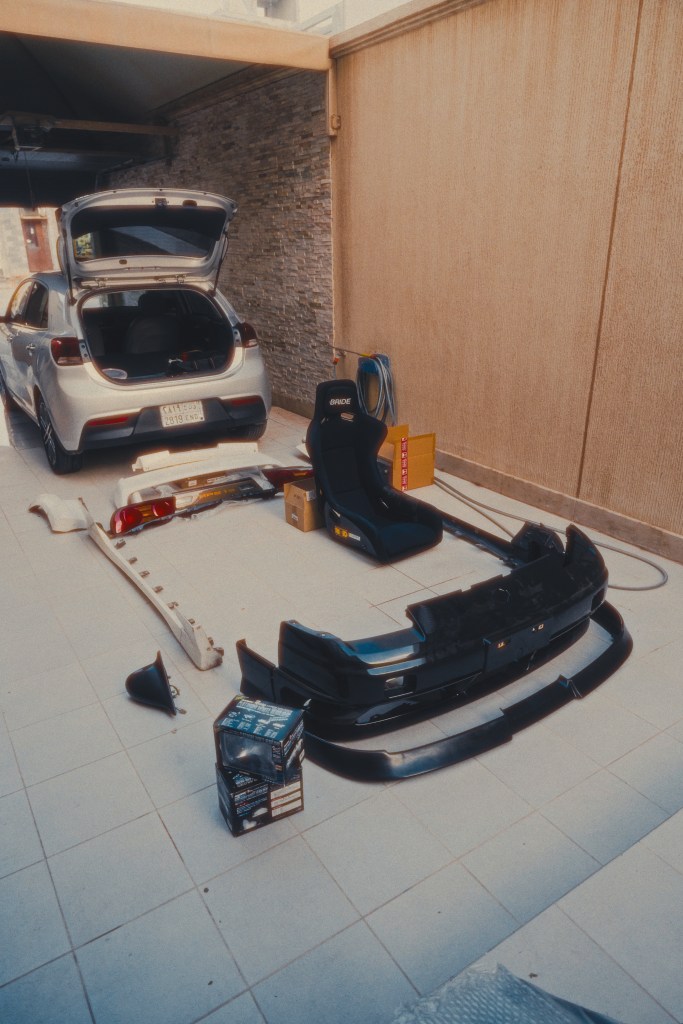
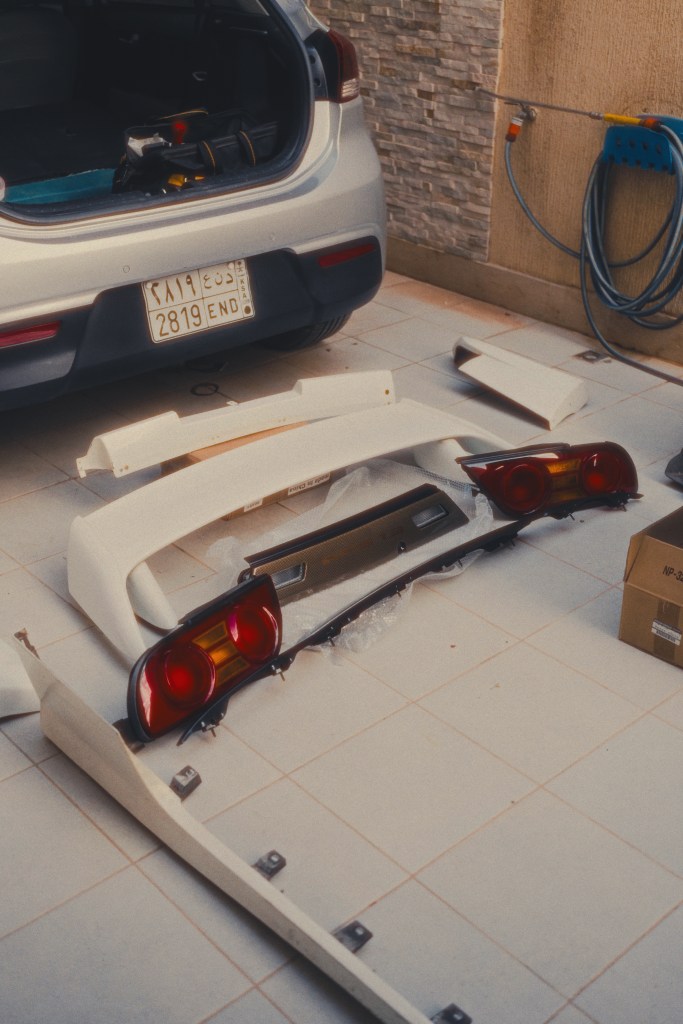
To end this second post, here are a few pics of the full aero setup laid out on the garage floor looking cool!
The car is very close to being done and progress is being made very quickly.
I had to keep this post a bit on the shorter end to keep all the bodywork in a separate post, since I would like to go into a lot more details on that whole process once the time comes!
Thank you for reading!

Leave a comment